UV mapping mess
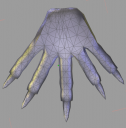
Is there a way to make a useful map out of this mess? I have tried almost every way to unfold the object but without success. What do I wrong? Any hints?


foot_uv.PNG
716 x 597 - 234K


foot1.PNG
782 x 795 - 415K
Post edited by jodwe on


Comments
Here is one way to do it. (Note - It's sort of difficult to make a surefire suggestion without seeing the whole model.)
https://imgur.com/a/CP5aX
First, set up your materials sections. There should be two - Hands and Nails. This is so that you can arrange the UVMap well after you're done and to give flexibility to the user.
You'll use the Unfold option and place a seam as indicated, looking down from the top, along the entire edge of the model. Then, you'll place a seam around the circumferance of each nail.
However, as you can already see, you actually have to plan out having your model "squashed" into two dimensions. Too keep the tips of the fingers and the area at the wrist from squashing together with attached/overlapping UVs, you might need to put a seam in those places. The tips of the fingers might be fine, since the Nails and that seam have successfully opened up the UV. The nails, themselves, may be fine, too, since they're split into two halves. But, here again, you might want to put a small seam there to open them up.
Try the unfold, first, with a seam that splits the entire hand, as seen from above, along the edge. Also, make sure to put a seam between the Nails and the Hand for each Nail. Optimally, you will end up with 12 different isolated pieces of geometry. If you find that the wrist area is squashing or the nails are squashing, add the small hash seams shown in the Bottom Seam view to spread them out a bit.
If you're not happy and don't get a good, clean, UV out of that, experiment with the "Pin" feature. You can add as many pins as necessary. I would start by adding a pin in the the middle of each hand and two pins along the fingers. However, pins obey absolute references and don't "second guess" your intentions, well, so they can be troublesome at times. Keep experimenting and watch how different pin arrangements effect your UVMap.
When you get it to unfold cleanly, Validate it and then move the Nail material away a bit. Highlight each Nail on the MODEL and then move that particular UVMap over a bit. Arrange them by highlighting them in the UVMap and move the two halves of each nail close together, then weld their edges together so that each nail is one contiguous UV Map. Don't worry about doing the same for the Hand. It's a large bit of real estate and as long as both halves are lined up for decent texturing, it should be fine.
Alternatively you can, if you wish, not put a seam on one of the edges of the Hand in hopes of getting it to splay out so that it's one contiguous UVmap portion for the Hand material. You can try that, but Hexagon will probably stretch the UVs on one of the halves. You can try putting a pin a few verts back from the very edge, looking from the Top, of the edge of the hand that you've chosen not to place a seam at in hopes of getting a decent unfold that retains relative UVMap area, but it will be hard to do.
Just work with it a bit and watch what happens as you try different unfolds. Seams should eventually meet with their opposing seam unless you're trying to do something special, like splay out a particular bit of troublesome geometry. With seams that meet to form one contiguous seam, you will get a nicely separated piece of geometry represented in two dimensions.
When you're done, you should have either seven isolated bits of geometry in one map (two hand material halves and five separate nail sections) or six isolated pieces in one map (one contiguous hand material section and five seperate nail sections).
Note: Hexagon DOES NOT save pins/seam information across sessions! This is very important to remember! So, when you start UVMapping such an object and will be working on a difficult unfold, make sure to plan to be there for awhile, since the save file will not allow you to return to the work to try different seams/pins - You'll have to start the unwrap process all over again.
If you need more help, I'll do some screenshots with a hand with the sorts of seams I'm suggesting. I know it may be difficult to understand simply from the ref pics I provided.