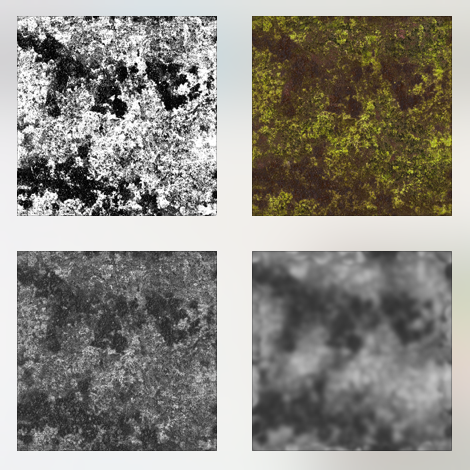
Shader creation from photos- A very brief overview
 Marshian
Posts: 1,465
Following up on a request I'm happy to give a brief overview of my shader creation process for a new product:
I search the store first to make sure I'm not copying anyone....or to make sure if there is something similar that it has been out for a long time. You can kind of estimate the age of a product by looking at its sku#. I'm always trying to create something new that hasn't been done before—I take my own photos or grab one from sites like pixabay or morguefiles. These sites offer free images good for commercial use. They have thier own rules such as you have to change the image somehow. I'd pay attention to those as I had a client that hired an intern to build projects for her- he used images without following the rules and she got a big bill for it.
I search for images that have patterns with no element that would stand out if it was duplicated several times, such as a brickwall with a hole. Into photoshop I use offset tiling (offset by half the image size) and the rubber stamp tool to blend the edges so they are seamless, this is where most of the work goes. Create the diffuse map first (at/around 2400x2400) and then bump, then gloss, specular...all of that if needed. I do the bump and Displacement as 16 bit grayscale so they are softer, less pixilated. I work in 3DL first because I might make the shaders work for both engines. This is where I fine tune the maps and do a lot of the testing. I usually end up back in photoshop to smooth edges where the seams (edges of the photos) show.
Into Iray- tweaking surfaces and making more maps if needed. Most maps will flow over into the same channel from 3DL after converting. Its good to test with white light and at a low angle (sometimes).
I keep my source folders organized and make sure all the maps I use stay put in the runtime/textures/product name folder. The big problem can come at the end if the image path points somewhere else. There is a DAZ product that helps collect all of the maps for packaging.
Thats pretty much it. The specifics are kind of complicated to explain- blending the edges after offsetting and the right images to start with. I really only use photoshop and DS but there are some programs that generate seamless images, others make blending the edges easier. I enjoy hunting down textures (online and in person) and converting photos for products. It is challenging but has a high reward if you like solving puzzles.
I'm available for questions here or a PM.
I may come back and edit these steps and ideas, its a WIP....


Comments
Will be paying close attention!
Good to hear. I'm going to build on these steps based on questions, feedback, and thinking on it some more.
Thanks a lot for the insights to the shader creation process. They are much appreciated.
One of the problems, that is common for me, when I try to create shader materials myself, is how to avoid repeating patterns with seamless textures.
I have seen that somebody divide the area to texture in cells and then each cell is covered with slightly different variation of the base texture.
Another possibility is to use a very big texture sizes, like 4K or more, but that affect memory impact on the computer.
Recently I have applied the seamless lava texture created in Filter Forge to the terrain generated in Blender and imported to Daz Studio.
When I was happy with the first impression of the render, later I discovered repeating patterns and all the effect was gone.
The question is to everyone - how did you deal with avoiding repetition of seamless textures in shaders?
Sure! Yes that is the common challenge, the puzzle. The three main directions for shaders I think about:
So this is more towards digging into the trouble- Seeing a repetition and where its likely to occur. You want freedom to do all three above and to use them in any circumstance, well except for an infinite flat plane at 100 feet up. That will show any pattern repeating. There are quite a few tricks if you're only doing a few renders for yourself or a client but a product needs to have the integrity to stand alone...naked in the middle of the room.