Making a boot
 RAMWolff
Posts: 10,212
RAMWolff
Posts: 10,212
Question for Joe
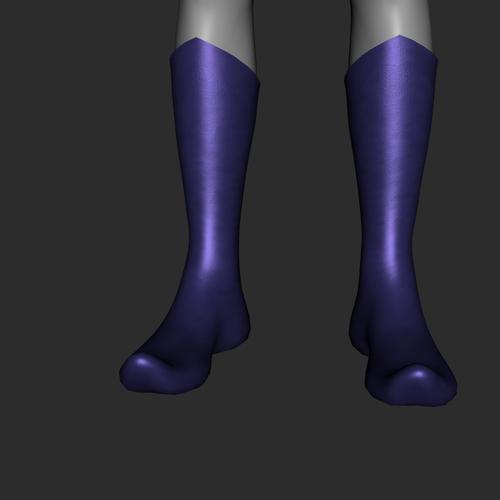
How does one make heels in ZBrush. I know this sounds strange. I used your freebie bodysuit to make boots and gloves yesterday but the boots need a very low heel. My issue is that I'm more of an organic modeler (what little I do) and so figuring out what premade shape to use and then getting a nice smooth, flat bottom as well as sides ... well my first attempt left me feeling a little stupid last night.
Also wondering what program you use to UV Map your bits in. The boots got auto mapped in ZBrush but there are some noticeable stretching on the sides and if I go without the heels the bottoms of the booties looks pretty horrid.
I found this one little UV app called Ultimate Unwrap 3D: http://www.unwrap3d.com/u3d/index.aspx
Thanks for the help sir! :-)
Daz 3D is part of 
Connect
DAZ Productions, Inc.
7533 S Center View Ct #4664
West Jordan, UT 84084
Licensing Agreement | Terms of Service | Privacy Policy | EULA
© 2024 Daz Productions Inc. All Rights Reserved.
Comments
Zbrush. Up at the top (if this isn't where you're going already), click on zplugin and then use UV master. If you want it to be all one big single map, don't check the polygroups. If you want separate "islands" for different regions, check poly groups. In most cases, you're probably best off clicking polygroups.
Ok
1) isolate one "sock" off of the starter mesh
2) mask off a sole region on the bottom (ctrl stroke), make the region a complete loop, even if that loop isn't the best possible shape for the task. By loop I mean a connected chain of polygons. You don't want your edges to look like steps.
3) After you've masked, go to visibility/hide
4) then polygroups/group visible
5) use the move and smooth brushes to shift stuff around until the sole region makes more sense as a sole region. In the deformations tab, polish groups and polish features might also help you out in creating a flat sole. What you have now probably looks like the bottom of a footed pajama
6) through masking and polygrouping, split the sole region into three groups
7)ctrl-shift click on a region to hide it.
8)In the geometries tab, click edgeloop twice.
9) repeat this for the main boot, and each sole region (You might skip the middle sole though, as I went on I found that loop and other things i did to it a waste).
10) ctrl-shift click in the middle of the heel region. You should just see the heel now.
11) In the deformations tab, down by inflate, type in 15 (or any other number that you fancy). Be careful not to accidentally click on the slider. Once you've accidentally clicked on the slider, you'll understand why you didn't want to do that (if that happens, click undo)
12) Repeat the same procedure and inflate value for the front sole region. You want to ctrl-shift click in the middle of it again somewhere to avoid accidentally selecting one of the tiny edge loops that is still around.
13) Do similar with the middle sole region, but use a smaller inflate number, 5? 10?
*whistles*
**Whistles more**
14) use the move brush to slide stuff around until the thing has a more natural boot shape. I just winged it. You might want to look at some reference photos so your final product doesn't look as ronald mcdonaldy as mine.
15) in small quantities, polish groups or polish features can also help you get a more natural relaxed shape (and help to reflatten out the bottom if it gets lumpy)
16) I used the smooth brush to largely eliminate much of the inflation that I did on the middle sole region, which Is why I questioned my earlier decision to create it.
17) Make the sole one group and the rest of the boot another.
18) to create a seam, double edgeloop the sole and double edgeloop the boot. This is the same procedure we went through earlier to add edgeloops. We do it twice because the second edgeloop is significantly smaller than the first.
19) ctrl-shift click a vertice where the green and orange edgeloops meet (the orange edgeloop below the green, not the one above it)
20) you should have a two polygon tall pair of edgeloops floating in the void now. Edgeloop them.
21) ctrl-shift click the middle. this will hide the very tiny edgeloop you just created.
22) Over in the deformations tab, type in a value of negative 1. Don't click that slider!
23) ctril-shift click out in the void somewhere to make everything visible again
24) ctrl-shift click the sole, then in the visibility tab, click grow once. in the polygroups tab, click group visible.
25) make everything visible again and ctrl-shift click the boot. In visibility, click grow 3 times (I think), now click group visible again.
26) somewhere in all of this, with all of the edgelooping, we accidentally added some extra crap to the top of the boot. You might just be noticing it now (i was), by masking off the portion of the boot you want to keep, you can then hide the rest and delete it in the geometry tab.
Cool. I'll give this a try for sure. Thanks so much Joe! Any way to pull out the heel a bit, not allot, not for a slipper bootie type of shoe but a little bit? I guess using the Move tool might be best but not sure if there is a way to control it so it pull directly out in the direction one wants to pull it. Like in Photoshop you hold down either the Shift or Ctrl key to draw a str8 line.
Yea, Canary mentioned the UV Master . I don't know why I think I need any other program than ZBrush! lol It's all there! :P
PS… never done an edge loop before! Eeek This should be allot of fun though. Your a great teacher! :-)
26) up in zplugins, use uv master, check symmetry and polygroups and then click unwrap. you'll get a boot with a sole map and a boot map.
27) export out your boot if you haven't yet
28) close zbrush
29) open zbrush
30) import in genesis
31) select that goofy star subtool thing, import your boot in
32) go back to your genesis subtool
33) append the boot
34) in the geometry tab, find mirror and weld
35) you now have two boots
You can use the move tool (i don't so I can't advise you), or, early on, when we still had three sole groups and were doing the inflating, you could always just inflate the heel more or use the move deformation with only the y active to make it longer (positive values will move the heel down and negative values will move it up).
You can do a lot with edgeloop and inflate. My cyber arms and full metal body suit were just very simple exercises in edgeloop inflate. The Turtle Shells, edgeloop and inflate. If you actually ever look at what Daz's supersuit really is, it's is just genesis with some edgeloop and inflate action going on.
I think this was a good idea to have this broken off into it's own thread but perhaps it would be better still to have this moved to the Nuts and Bolts forum! :-)
I can move it with no problems, if Joe thinks it is the best place for it.
works for me
OK, hold tight while I transport you through cyber space.
Toto, I don't think we are in Kansas any more! :P
Hey Joe.
One more question for you. In ZBrush, I have both boots. How do I delete one of them? I've looked through every menu. I searched on Z Central .. nada or I'm not using the right key words. I masked it off but not sure if that's the way to go. HELP!
Turn off symmetry then
A) You could mask the one you want to keep, then in visibility, click hide, and then in geometry click delete hidden
or
B) In the void, ctrl-shift click, and then drag the green box so that it encompasses the boot you want to keep. In Geometry, click delete hidden.
Though, you don't have to only make one boot and then duplicate it. Using symmetry you can make both at once. I just find that I get a better view of the thing I'm working on if I just do one at a time.
Thank you Sir. Your such a help! :-)
GAH... what did Pixolgic do to the Mask area? There used to be an area at the bottom to sharpen or change the focal shift so there was no blurring what so ever. Using the tools at the top of the user tool bar doesn't seem to work on this. I can't get a tight mask as you show in your first image. :-(
OK, On my way here, I think.
Even though the Mask feature seems to have changed and missing are some of the sliders to make it apply more sharply I went ahead and went for it for what I had. Following your information I got pretty much the results I THINK I'm going after.
I did find one little tool I don't know if you use or not but all the fiddling around with the smoothing and move brush gave me OK results but then going into the Deformation area and use a small increment of "Polish by Group" really did a nice job of finishing up the edges.
Off to the gym now... I need a work out.
Got most of the boot done. Wanted to add in some stitching at the top and perhaps down the center front of the boot. I think you mentioned something about putting in some extra loop edges later on in the tutorial so perhaps I can make that work for those areas. I decided to make the sole of the boot more one piece since it's so low. More like a slide heel. Looks really good and I'm thankful for your tutelage.
Had an issue with mirror and weld but Joe came to the rescue once again, here is the info in case anyone else runs into the same issue:
My issue was that the Mirror and Weld tool wasn't working for me because it seems that ZBrush has the default for the "Prime" side set to the left. I created the boot for the right foot. Read on.......
The models right hand side, your left, is the "prime" side. So if your boot is on the models left foot, and you're trying to mirror, it's attempting to mirror nothing (there is no geometry on the right hand side to mirror). That's why you're getting that error.
1) Load Genesis first
2) Load the boot in a seperate subtool window (I usually load things into the subtool window that has that star thing in it)
3) Append the boot subtool to the scene that has Genesis in it
4) In the deformations tab, use the mirror feature (this will move the boot to the right foot)
5) In geometry, now click mirror and weld
So ended up a few issues that were not acceptable. Perhaps in time I will understand Edge Loops better but when I was rendering in DAZ Studio every thing with Edgeloops would render as if it had a transmap on it. So I ended up with very noticeable gaps. I thought it was the smoothing but removing that did not erase the issue. SO... I thought back to square 2 since I had the basic boots saved out as a separate ZTL file.
SO opened that up. Decided to just work with symmetry and not just one boot but both so I could bypass that mirroring thing.
After reshaping the boots and spending some time moving all the verts to more logical positions to build a sole. I STILL was not happy with it. SO.... I decided to try again building my own sole.
Here's the process as much as I can remember:
1- In your Sub Tools Append and add in a Sphere. You will see it's HUGE.
2- Zoom out and mask both sides where it all comes together to that point, we want to eliminate those bits. Make sure the center is NOT masked so as you rotate the sphere you will see a solid line of non masked Verts.
3- Under Masking Sharpen the mask once and rotate the sphere to make sure it's even all the way around. If not then apply more masking as you rotate until your happy with the results. Should be about 3 to 4 rows wide total all the way around.
4- Go to Visibility and HidePt
5- Then up to Geometry> Modify Topology and
**Delete Hidden then
**Close Holes then
**MergeTris
Now you have your row of mesh you need to form the boot sole.
6a- Go into your Geometry area and click the Size area and reduce to about the size of the boot.
6b - Go to the Deformation area and using the Rotate tool, set to "x" rotate it till it's pretty much lined up with the footwear.
7- Back to Geometry> Move it to to the "left" boot side of the two using the Position tools.
**This is very fiddly and will take some patience but you will get the newly created mesh as lined up and sized as closely as you can to the bottom of the "sock" of the footwear your making.
8- Select the Move Brush and begin shaping the new mesh to the shape of the boots.
**Now your thinking... this is getting messy.
9- Go to the Deformation area. You will grab the slider of the "Polish by Features" and pull it all the way to the right and release.
**You will be pleased that the shape is now smoothed out but the sharp edges are preserved.
**Keep remolding the new sole and using the Polish slider as you go along and you will eventually reach a nice conclusion.
10- You will see that the sole may be too thick for your needs. This is easily resolved. Deformations> Size. Sex to "y" and slide to the right until your happy with the thickness. If you want it thicker slide to the Left until your happy with the results.
11- Now go to the Geometry> Modify Topology area and click Mirror and Weld once (Make sure it's set to "x" (upper right corner of the button). The Left side will be mirrored perfectly to the right and now you have two soles for your shoes.
For a more polished look to the footwear you can do the same thing with using a Torus to create a seam or trim around where the sole and shoe come together.