Grouped or Ungrouped Question..
 ravynclover
Posts: 0
ravynclover
Posts: 0
I have a building interior that I set up to use in Bryce. Should I leave it grouped the way the model imports or ungroup it. This is the first interior I've tried in Bryce so not sure what to do after parenting all the beams etc to the wall sections.
I hope the image attaches OK..
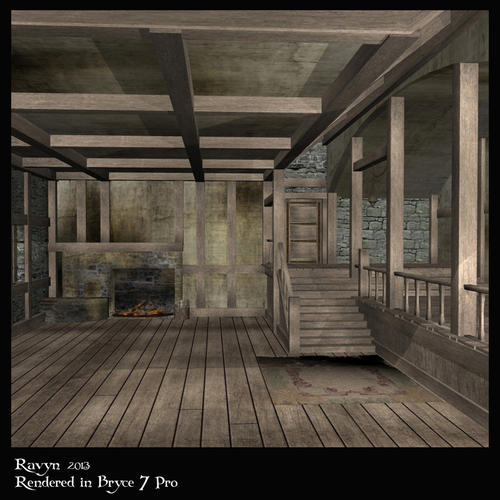
DAZ.jpg
800 x 800 - 477K
Post edited by ravynclover on
Daz 3D is part of 
Connect
DAZ Productions, Inc.
7533 S Center View Ct #4664
West Jordan, UT 84084
Licensing Agreement | Terms of Service | Privacy Policy | EULA
© 2024 Daz Productions Inc. All Rights Reserved.
Comments
That's a nice looking interior.
What some people say is that grouping only makes Bryce draw more boxes and everything that Bryce has to do extra takes up precious memory.
What I usually do with complex models is select pieces and organise them into families using the families block in the object's little floating sub menu (second icon down usually a solid grey square icon). Families are neat because if you have all your wood as one family, you can easily select that family to change all the wood at the same time. Same goes for all the stone or any other set of objects that share the same material.
If your model isn't slowing Bryce down or causing memory problems, you can also group the whole thing as one group so you can select it all easily to move, rotate or resize it. Just one group isn't going to labour Bryce too much.
@ravynclover - use grouping only for boolean operations. Use families and parenting otherwise. And that interior does look nice!
Great looking interior! Very impressed that this is your first. Those above have answered your question, I'm going to make a comment about lighting. Lighting interiors is very tricky. Very tricky indeed.
Do check your shadow intensity settings, looks to me like you might have a bit of a light leak.
I've marked the shadow intensity controls - ideally these should be set at 100.
Skydome colour - particularly for an interior should be set to fully black.
And unless you want a special effect, set the Global Ambient colour also to fully black.
Those last two swatches are shown in the very left hand corner of image 1.
Thank you all for your comments. I appreciate it. I think I'll leave it as is. Only takes a couple minutes to render with the default settings.
This has been one of those models that just didn't want to do anything right.. Including the renders.. LOL .. Except for changing the skydome color, I started out using David's settings but the right section was just too dark. Tried less shadow but the ceiling part was still almost black so I added a radial light to get it to show up. And even that didn't want to work the way I thought it should..
Did a quick, close up night time scene for my desktop. Not the greatest but it gives you a better look at the fireplace. Lights are the hardest thing for me to get right in any program, tho I don't find Bryce as confusing as some of them..
@ravynclover - looking good. We may argue whether the black shadow parts are not too dark, but if you used a fast film for your photograph, that's what it would look like. What we cannot argue is the dark back of the gentleman. There's a fire and that should light up the back slightly. Nevertheless, small quibbles. Very nice render. The model is just great.
Don't know why but I'm a big fan of the dark, hard shadows. I was so busy trying to get some light on the figures face that I forgot about the back. Should have pulled the fireplace light a little further forward. I have got to learn to do those god rays. I'd love to do images with the light streaming thru clouds or windows. So far nothing I've tried looks anything at all like the tuts I was using.
It is more atmospheric now with the darker shadows. I think it looks better. If you've got the processing power to cope with it, you could experiment with TA (True Ambiance) rendering. This is a premium option, but it is challenging to set up for an interior. There are a few tutorial here by me (and also I host some by Horo here and he has some relating to this topic too) http://www.youtube.com/user/davidbrinnen - the TA ones will generally be found in the more "advanced" playlists.
TA is certainly an effective option for this render but premium effects might not be the route you want travel yet for various reasons. Bryce 7 also has a bunch of new advanced lighting tools designed to help in situations like this. These tools are not as difficult to set up as True Ambience (TA). In particular, the 3D Fill Light is the tool you need here. Here is what I suggest:
1. Open your scene.
2. Create a Cube 3D Fill Light. (Second to last of the new lights on the Create shelf if reading from left to right)
3. Select Top View
4. Enlarge the 3D fill so that it fits within the room and almost touches the four walls of the room. You will then select Front View or Right View so that you can fit the 3D Fill into the room along the vertical axis as well.
5. Once you have made the 3d fill to occupy the full volume of the room you will probably already notice that there is a good indirect light starting to crop up in the scene correcting those possibly overly dark shadows. Since light always bounces total darkness of shadows is rare in real life. How we correct for shadows really is where the magic happens
6. The 3D Fill Light is comprised of a network of "virtual radial lights" floating around within a spacial volume determined by the physical size of the light object. The idea is that a large number of radials can be controlled at once. Instead of manually placing a few dozen radial lights around the corners and walls of the room to produce some of the missing bounces, the 3D Fill arranges them for you. The higher the Quality setting, the more virtual radials used and the smoother the resulting light. The intensity of a 3D Fill is distributed among the virtual radials comprising it. By comparison, we know that a normal radial and a 3D Fill assigned a diffuse intensity of 25 will produce the same amount of total light, but with the 3D fill the light intensity is distributed among many radials covering many points within a volume of area so the light technically doesnt come from a single point as it does with standard radial lights. The result of that is that the 3d Fill can do a fantastic job of faking bounced light within an enclosed area.
Once you get the scene set up you will need to play around with the intensity of the Fill Light as well as the quality as avoiding shadows bands is essential. But usually a quality of about 100 will do for a scene like yours.
Best of luck.
@Rashad: Nice lesson, very useful.
Nice interiors ravynclover.
Thank you for the info Rashad Carter. I did a render with the 3D Fill Light. It definitely lightens up that ceiling.
I also tried to get a little light on back of the figure in the other render but no luck with that one. I think it might be the way / place he's standing.
Anyway.. Here's the light test i did. Maybe I'll get it all figured out one of these days.. Thanks again for the help & the nice comments about the model. I've got a couple more that I'd; hopefully they won't turn out to be as big a pain to work with as this one was.