Message in a bottle - putting stuff inside a glass prop say
 Roman_K2
Posts: 1,252
I think I am beginning to think like a 3D modeller. I imagined how I might "roll up a sheet of paper" in Hexagon in my head (eg. sweep a curved line) and when I actually did it on the computer, it worked!
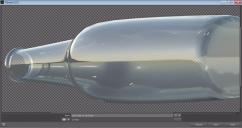
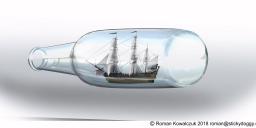
So is there any trick to putting big stuff (like Faveral's pirate ship) into a small prop like the glass bottle in the garbage pile? I had a real hard time positioning these items. After successfully chamfering the bottle (yay!) in Hexagon I sent it to DAZ Studio... I then rendered the two main items separately and then sort of tried to put them together using transpapent layers in an image editor. Not bad for a first try but, putting a large model inside a small model seems problematic.
One thing that caught me off-guard: it is possible to chamfer a surface but the result is "so small" that you cannot see what has transpired unless you happen to zoom in on it.
Also I have now chamfered one object successfully (yay!) but I have so many renders on file where the main prop is all pointy and needs smoothing. Example the wheels (landing gear) on Polish's private jet prop. If I'm not mistaken it's a huge model so I can't exactly import into Hexagon....







Comments
A couple of notes...
Very small chamfers can be very useful in some situations. Like when you want to control the way that an edge is smoothed when you apply the smoothing levels. So there's a reason that sometimes you may not want to see the effects.
If I can load Genesis Female 8 into Hexagon, it can probably handle most large models without too much of a worry. You can always try with the jet plane and see. :)
As for putting a ship in the bottle, the easy way is to just scale the ship down until it fits. In Studio, I would parent the ship to the bottle so that they move together and translation of the ship in X,Y, and Z are relative to the bottle instead of to the world coordinates.
The only "problem" with that approach is that technically when the ship is really small you wouldn't need all of the details that are in that model. For one render, I wouldn't worry about that too much. If I were planning to reuse this over and over again, I might pull the ship into Hexagon and work on reducing the number of polygons, etc.
Good work so far, I like the idea.
Real ships in a bottle have some putty at the bottom looking like water to hold the ship in place. For that you would propably need some boolean operation between some putty mesh and the bottle.
The water part would be fairy easy to make (When you have finished the bottle, uv mapped and smoothed it) -
Copy and paste the bottle. Delete the top half of the bottle, delete the outer faces. This is the tricky part - Bridge the top edges, remember quads are best.
This does sound like a nice little project, I'd like to give it a go myself :)
For the water I was thinking of using the split pill-capsule in Maclean's Everyday Morphing Primitives set. It's a toss-up whether the water surface ought to undulate a bit, or not.
Thanks. I will probably give it another go, working more in Hexagon than in DS. Agreed that there would not be that much detail in your average render... sometimes I exaggerate things on purpose, esp. for the web... for example take this poppy: I enlarged the head and the shaft of the pin to make it more visible. No way a "real" plastic poppy would have such a large pin.
But yeah, I would think about thickening certain things like the cannons and some of the ropes and so on... I will often go back, in a vector program (like Corel Draw) and I'll ad some heavier lines.
What about smoothing only part of an object. So far I have solved this issue by smoothing the whole thing and making two renders, in DS: one smoothed overlaid onto the unsmoothed version. From there I have cut away the part that I didn't want smoothed.
Use the smoothing tool in the surface tab
If you're just adjusting someone else's model for your personal use, the Smoothing Tool is a good choice.
When modelers are creating new models, it is very common for us to add additional edges in places where we want there to be a hard edge so that the automatic smoothing doesn't change our models in unexpected ways. One the model passes out of your control (becomes a freebie or commercial product), you can't be sure that someone won't turn on sub-divisions or smoothing in the rendering engine and then feel like your model isn't designed well because your hard edges got soft.
Other programs have easier ways of designating hard edges when subdividing. You only need to look at Carrara to see this. Unfortunately in Hexagon this function is tied to the smoothing tool. But that will still sudivide the whole of the object.
I use Carrara to crease edges before giving OBJ models away to people and other apps.
What do you mean by "crease". If I have a flat surface -- or maybe two points -- and I want to "crease" it, I'm seeing a sort of trough or ridge in my mind's eye, breaking up the flat surface in some way or three extra points situated in between the base two points, with the middle point of the three new points being either a little bit down (to make a "trough") or a bit up to make a ridge.
Thanks to all about the Smoothing Tool tip... obviously I have not been there yet - the Smoothing Tool, I mean.
Thinking about the "undulating water" in the glass bottle with the ship made me think of wavy shapes.
Using a technique similar to the way I made my "35mm film strip" a while back I tried making a thicker object. Something like a piece of chewing gum or a tongue for a cartoon dog.
In the attached illustration you may hopefully see how I have flattened a square and then I extruded the square it five times to get the basic shape of the chewing gum. Question: how do I "add mesh" since the Bend function works best when there are some edges and verteces to work with.
For starters would it generally be good to split the object down the middle? I've put in a dotted line on this screen shot here to show my intent - where I'm at and where I might be wanting to go next.
Would using Fast Extrude to go sideways to quickly "double" the mesh?
A bit later on I figured out how to start rounding off the tip of the shape, if it is to be a "tongue" say. However the rounded-off shape now refuses to bend, say along the lines of the curve I drew. Too much smoothing, perhaps???
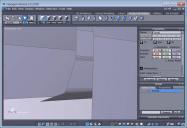
Finally, I tried doing all of it in a different, more organic way but my first attempt resulted in a tiny gap in the surface, which interfered with me trying to select a loop. Subsequent attempts had other issues, esp. with rounding off the tip of the "tongue" say. I can close off a hollow cylinder with a dome-like cap so I'm not sure where the trouble lies with that one.
Un-smoothed models from Hexagon look strange in rendering apps because the Phong shading is confused about normals. Lots of dark shading on the models faces where there shouldn't be. Creasing edges along those shaded areas fixes everything for better rendering. If a model is hi-res, you don't have to worry as much about Phong shading.
I have been playing around with various gum or tongue-shaped surfaces for the "water" for a couple of weeks, plus a couple of others. In each case the water prop has been made, or modified, in Hexagon. There are definitely lines that pop up here and there... sort of like a crease I guess.
On the plus side I liked how the tongue shaped object -- which I flattened for use as "water" -- sits squarely in its bounding box. Been getting a lot of objects not sitting nicely in their box... I find that harder to work with.
I love messing with the water!
Smoothing n-gons will do that.
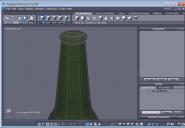
For the bottle, could you not start with a cylinder and just pinch the different tiers?
Use thicken on the "surface" tool bar for the bottom & top?
Or
"Extrude" on the vertex tab to make the bottom?
Actually since the renders take so long, using a simple Hexagon primitive for the bottle makes a lot of sense because (9 times out of 10) I'm probably going to screw things up in the early going.
I am easily distracted... like I will veer off and try to make the lantern red (in DAZ Studio and with post-work) and I'll play with dramatic skies and rough seas, neither of which you are likely to find in a glass bottle.
Otherwise I am getting reasonably good water surfaces from Maclean's morphing primitives set, and onto this I'm trying the various "water" choices in Jen Greenlees' nature shaders set.
Still trying to understand the underpinning geometry for water surfaces -- and the final result -- via very, very basic experiments. Really not sure what happens when a surface has "thickness" say, as opposed to what you get when you lay out a simple grid or plane with a thickness of zero or whatever the default value is.
The thicken feature is news to me!
To show this graphically, since you're talking about water in a bottle, let's assume you have an empty (square) bottle like this...
If you put a plane in the middle to be your water, the material definition only covers the single surface of that plane like this...
However, if you make it a volume, then the material definition covers the entire space including everything under the water plane. This is especially important for water where the transmission and refraction of the volume in the water is important to making it look realistic from certain angles.
So, if you only render from a high angle looking down a the surface, you may not see a big difference. But if you need the volume effects, you'll want to use some geometry that covers that whole space.
I guess I figured as much, yes. Will there be much difference in the result if "viewed", say, "from above" at a 45 degree angle?
I am thinking... maybe that I would try a thin plane (zero thickness) side by side with a simple volume-object... same lighting in both cases and... with the same shader applied.
Btw I have Dumor3D's Iray Glass shaders with their abberations etc. and I have been thinking about the differences, if any, between glass and water shaders. Also the 3DL versionn of JG's water shaders seem to be quite good for making waves and ripples.
It just now occurred to me to look up pictures of ship models and "messages in a bottle" to see what gives with the reflections and everything.
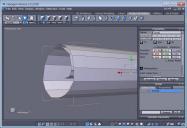
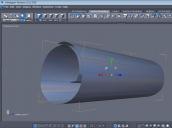
FWIW I'm not sure what you mean by "pinching the tiers". Also I got confused just now while making a cylinder by sweeping a circle.
In this screenshot, what is the yellow line through the cylinder for? And it has two red hooks or controls of some sort at each end?
That depends on a lot of things - size, refractive index... even its shape and what objects are nearby.
That's a control curve.
Instead of a sweep surface, use an actual cylinder and scale the loops around its surface.
Ok thanks... got it. I just thought I'd give it a try the other way - the sweep line method.
The wrong tool. The line extrusion would be the one to use.
Still working on understanding water. Many test renders.
Unfortunately I spilled some coffee (cream and sugar - I never take C&S!!!) into my computer and a few things are messed up like the Function keys - needed to make screenshots. For some reason on my other computers there is either no Hexagon, or Hexagon doesn't work. Bit of a surprise, this.
Since I have the DAZ coffee mug model and there are one or two keyboards I became real interested in modelling liquid coffee (for my Avatar) shown spilling into a keyboard, and in modelling organic liquids in general.
To try my hand at making a puddle I drew an irregular shape with the curved line tool, and I extruded it a bit. I seemed to have trouble closing the "hole" and on closer examination it appears that I did not have a contiguous shape to begin with; there is a gap in the line. Too late to fix??? Just curious. I seemed to have trouble with smoothing as well -- probably due to the un-closed shape -- and there were some aberrations in the surface. Still, it seemed to render reasonably well for a first try, using one of the Uber glass shaders. The outtake below is from when the render got to about 800 iterations. I couldn't resist a bit of post-work (drop shadow) and just for fun I put a bit of a spin-distortion on the aberrations. This will continue to render all evening and for version "2" I'll try to simulate the meniscus (surface tension) better.
Some of the things like "Form 0" and "Curve Control" that come up in the creation process are a complete mystery to me. No idea what they are for and how they got there.
Or you could just plug a working keyboard in.
Just weld the points together.Roman,off topic - Have you tried using the "Print Screen" key rather than taking a photo of your monitor ?
Ascania is correct about the weld points tool. Other methods to look at are the Bridge Tool and Coon Surface. Hexagon gives you more than one way to overcome problems, the trick is to find the right tool (workwlow) for the job that works for you.
Snipping tool is usually more convenient to use.
Thanks, I thought the snipping tool would be good when it first came out (in Windows 7? Not sure of the Mac equivalent, if any) but it turns out I don't quite like it.
And BION, some computers come with a limited number of USB ports. Of course there's always hubs and various KVM attachments and options but... I will probably just order a replacement board off of one of the parts sites; using old equipment does have benefits in that partz are usually fairly cheap.
Anyway on the damaged keyboard screenshots seem to depend on a proprietary Toshiba function key and those are out. I think it took me until this morning to figure out that using a standalone USB keyboard brings them back under the aegis of "Alt-Print Screen" so that's good. At least I didn't get TOTALLY slimed!
That's a really nice looking puddle of liquid there, Roman. It has a good organic natural feel to it.