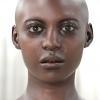
Free Beginner Tutorial series: Texuring Genesis 3/8 in 3D Coat/Photo Shop
 remcovanembden
Posts: 106
hello everyone. I will post texturing tutorials here. Everyone can follow. I use 3Dcoat in combination with Photo Shop. No photo shop is required, another photo editting software can also be used in combination with 3D coat. Any other 3d projection software can also be used (think of Zbrush or BodyPaint3D). If there is only one possibility to send it to a 2D editting program.
I will indicate which texture resource I use so that everyone can follow everything and together we can achieve the same results. I also share all editing files (think of actions, brushes etc).
When this tutorial is ready, we will look for the next resource so that we can help each other with it.
I use the photo reference from Jindriska
(Human photo references and textures for artists - 3d.sk - ShowSet Photos)
The videos are made in real time, so no editting.
Okay let us first start with preparing the photos
When I look at the photos I see different things:
1. highlights
2. shadows
The best are photos that are as flat as possible. So we have to tackle the highlights and shadows.
I have made an action set for photo shop, so if you are not too confindent with how to tackle highlights etc then the action will do most for you.
I also included a color correction action for this photoset.
Which you can download here:
https://www.dropbox.com/s/pnbifxdh233gi9g/JindriskaActions.rar?dl=0
Remember this is not universal, although it might work on other photoreferences.
Feel free to post questions etc


Comments
How to remove eyelashes on the under eyelid:
A new mini tutorial on how to import genises 8 head and neck in to 3d coat.
I export first the head and neck area to save memory and that way i can texture the model much quicker.
Okay let us start the fun!
It is the easiest way to start texturing first the sides of the face like in this video:
Interesting, thank you.
Thank you. Are you making any more tutorials for using 3DCoat? Some text along with the imagery might be helpful.