Layering textures in 3D paint
 Roygee
Posts: 2,247
Hi all :)
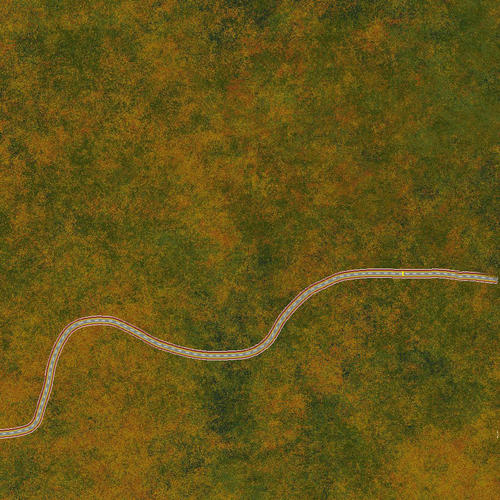
I have a baffling problem. The first pic is a procedural texture of a terrain exported from Carrara, with a road texture exported from RoadMaker layered over it. The layer is merged down and is in .jpg format, so no floating layer.
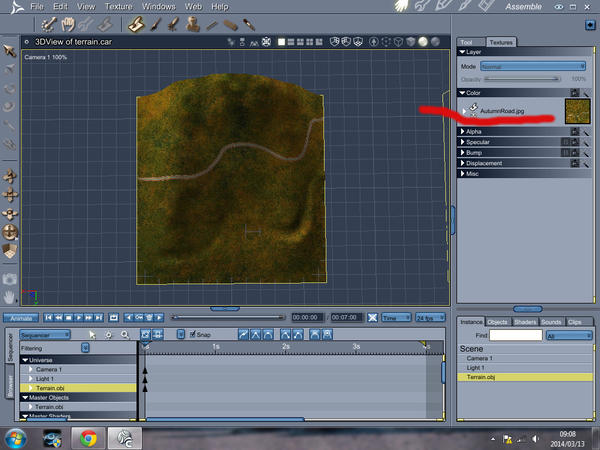
The second pic is how it maps using the import function in 3D paint onto the terrain it was exported from - the original texture was deleted from the terrain before importing - see how the road texture is totally out of place?
Any explanation as to why this should happen? I've done this before, many times, and the texture always came in correctly in place.
Secondly, how do I layer a texture over another using the import function in 3D paint? I can make a new layer, but can't find an option to bring in another texture to layer over the backgrounf texture.


Comments
So I wonder, could you load the image you need to add to an empty layer into the brush? A trick we do in Dogwaffle all the time, is to load new elements into the amazing Dogwaffle brush, from which a good many things can be done.
The second image looks rotated 180. In that state, the bulk of the green grass does appear to be on the correct side, but when rotated back, will it still be so? Just food for thought. I've never used the app you speak of. But I've never had an issue getting height and color maps lining up correctly either.
So, what you're thinking is to load the grass with no road over the whole terrain, and then put the road in using a layer... perhaps a brush is the method to try. If you go this route (if it even lets you make the brush that big), try leaving softness 'off' for the road image as a brush so it doesn't cut off too early at each side. Then load in the grass as a brush, set softness so you don't get a distinct line, and paint it down where the line occurs from the road map - if there is one to fix.
Have you added any filters to the terrain? Changed the resolution of the terrain or the terrain map? I'm just spit baling here too, as I haven't used the software either.
Hi guys :)
This was just Carrara doing its occasional trick of bringing in texture pics flipped and rotated. Eventually got them aligned in the texture room by using parametric projection and fiddling about with rotating and translating.
There are some issues with getting RoadMaker to work properly with Carrara - for one, it doesn't output a square map, secondly Carrara doesn't like its version of .bmp - the only format it uses- thirdly, the road texture is pretty poor. Thanks to Horo over at the Bryce forum, I found by converting to .tif the heightmap works brilliantly in C. Once I've worked through the issue of the non-square map, and I have some ideas on how to do this, Roadmaker becomes a good proposition for making roads, railway lines and rivers.
Back to the 3D paint question. I can load the map of the road in the alpha section of 3D paint, but not in the alpha channel of the color section - that can only be used for painting. Using the paintbrush is no good - it has to be stamped on - which is pretty fiddly to get it sized and aligned correctly.
It loads in the alpha section, but it seems that there is no way to combine and merge the two. In Bryce it's a simple matter of loading one texture over the other.
One good thing about trying to figure out ways of making software do things it wasn't designed to do is that you end up learning a lot :)
Hi Roy :)
I may be missing the point, but,. isn't overlaying two texture maps something you'd do in the shader,
3D Paint is designed primarily to allow you to paint directly onto the model,. rather than construct multilayer shaders with different image layers .
jus thunking out loud
Andy :)
Hi 3Dage :)
The point, in general, is to explore, push the boundaries, boldly go where no man has gone before:)
In this particular instance, I had a problem in that there is no option in Roadmaker to choose output resolution, it does it at 1024 X 768 and the texture it had to overlay was at 1024 X 1024, so Gimp centers it. Not having any reference point on the underlying texture, it is a hit-and-miss exercise to get it correctly placed.
So, I had the idea that if I could do this in 3D paint, where I could see the contours, this would work.
I did first try bringing it in in the texture room, but this was far from satisfactory. What I did was to use a mixer, with the background texture as source 1, the road as source 2 and the the alpha map of the road as the mixer. It was a mess, with the road surrounded by a jagged white line. Using pre-multiplied alpha made it slightly better as the jagged white line became semi-transparent.
Possibly there's a better way that you can help me out with?
What I'm thinking now, haven't tried yet, is to control what I can and accept what I can't. So, possibly making the terrain dimensions the equivalent of 1024 X 768, and exporting the procedural texture at that resolution may work.
Alternatively, I could bring the heightmap into Gimp temporarily to give me a reference point.
Hi Roy :)
Depending on what roadmaker outputs, could you take that into photoshop then select the road, invert the selection, delete the background, then overlay that (road on transparency) onto your ground texture.
In a 2d image editor you should have the ability to scale and adjust he road to fit the terrain map, even if you don't export a merged image (terrain plus roadway) you can export the road at the right dimensions for loading into a terrain shader, or mixer
I like the idea of adjusting the terrain dimension to fit the roadmaker software. it's worth a try.
is there no square output from roadmaker ? even if it's smaller, and maybe scale it up.
What may work also is if the roadmaker software creates a road bed on the gray scale height map, but doesn't add the texture, you could use 3D paint to make a black and white distribution map to define the road surface. Then, you could open the resulting image map in a paint program and use that as the template for adjusting your road texture. Or you could add another terrain layer and use the image map as a distribution map and use other Carrara shader functions to create the texture. The latter suggestion may work better for gravel or dirt roads, or roads without stripes.
I would set the terrain to white, and paint the roadway black so you can see the details of the terrain.
Thanks for the advice, guys :) They are all doable.
What I've settled on is to duplicate the terrain, leaving it in place. Deleted the shader from the duplicate and textured the duplicate with the road, using a mask in the alpha channel.
This way I can continue tweaking the shaders without messing it all up:)
In this one, I've replaced the colours in the shader with good pics of rock and grass - not working very well at the moment, but I'll keep at it.