How can I do a better render after export with mcjTeleBlender
 sioc
Posts: 299
hi,
First, thanks to Casual for the amazing script see http://www.daz3d.com/forums/discussion/2877.
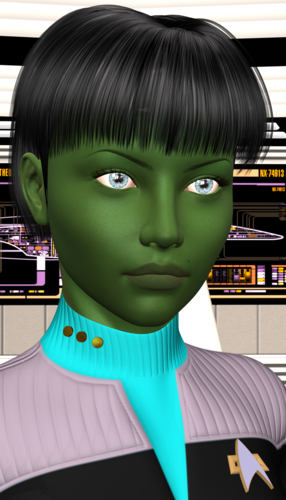
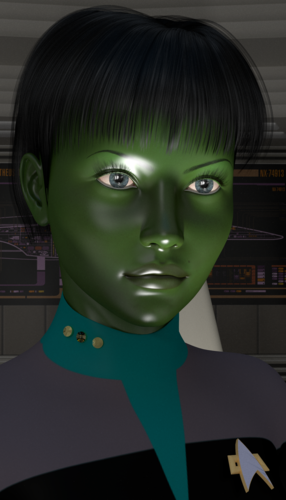
Secondly, i'd like some help below the same scene exported and rendered with Cycles under blender v2.71 and rendered with 3Delight.
How could I adjust the scene under blender so the skin will look less plastic ?
Thanks


orion-3delight.png
1142 x 2000 - 3M


orion-blend.png
1142 x 2000 - 4M
Post edited by sioc on


Comments
--- If you're in Daz Studio's Surfaces tab, , the brighness/lighness of the color applied to the Specular channel of the surface will decide how glossy it will be in Blender (and in Daz Studio )
also in Daz Studio, in the mcjTeleblender script itself, there's two settings named "gloss factor" and "roughness"
the values 0.05 and 0.3 work well for me, i think the default values are set too high
once you're in Blender you can select your figure using a right mouse click
then click on the little button that brings up the material editor
then in the list of materials, select a skin material
by changing the darkness/lighness for color of the BSDF Glossy section of this material you can control the strength
if the BSDF Glossy of the skin material type is set to "Sharp" the surface will be like a mirror, "Beckman" is more appropriate for skin
the roughness setting also influences the type of glossiness
I used your settings named “gloss factor” and “roughness”to values 0.05 and 0.3 and I replaced the Glossy Shader by a Subsurface Scattering, below the result, it's also interesting.
I have also to find why the bump maps didn't applied on the clothes and surely everywhere...
if the bump map succesfully reached Blender, there will be a "Displacement" section for that material
and adjusting the strength is very important
in the case here i had to increase it to 6 to get good wool bumps
Damn it it is a normal map... apparently not the same place / settings
i almost never used normal maps so i overlooked this sorry
next teleblender update ( very soon ! ) will include normal maps
----
to do it manually you have to add a Normal node to the BSDF-Diffuse "Normal" parameter
then you must add a "Texture Image" to the normal Map's "color" parameter
Note that i had to UV-map the default blender cube before doing my test else the cube came out black, but Daz Sctudio objects will have a good UV map to start with
if the normal gives the inverse of the expected displacements ( holes instead of hills )
then one must add separateRGB/combineRGB nodes to invert the map
( i found the recipe here:
http://blenderartists.org/forum/showthread.php?325149-Negative-Normal-in-Cycles&p=2564667&viewfull=1#post2564667 )
In the next version of mcjTeleblender, this will all be taken care of by mcjTeleblender / mcjBlendBot
--
fig 2 shows a plane with a sand-dunes normal map
and a HDR World Environment sky using an equirectangular map from sibl archive
http://www.hdrlabs.com/sibl/archive.html
Yes!! that worked! see below.
Thanks a lot.
Blender is a nice software.
That seems to have worked for me as well thank !