Replicated trees on terrain
 TangoAlpha
Posts: 4,586
This is sending me potty - I'm sure it's supposed to work but I'm damned if I can figure wha's going wrong.
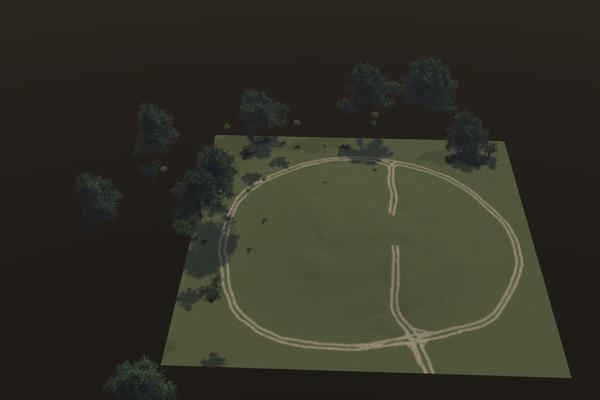
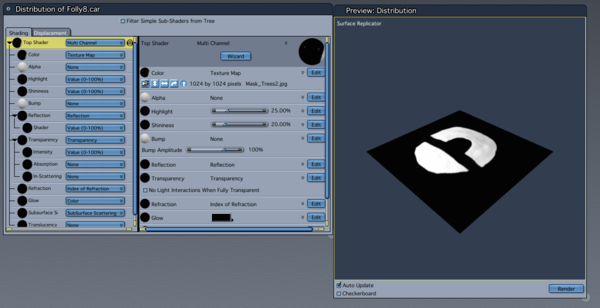
I'm trying to put trees on a terrain (you probably guessed that much from the title!), bit they don't seem to be going where I want them. I've defined a mask that limits the trees to the area inside the track, and set this into the shader (see pic)
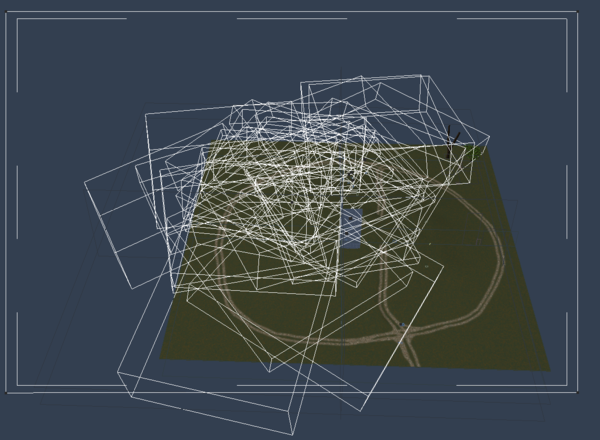
The trees are tweaks of one of the defaults, with custom leaves (single poly 5" x 3", transmapped texture, saved as a .car and loaded into the tree editor). For some reason the bounding boxes seem to be massive, and I suspect this is the root (ho ho) of the problem. But damned if I can see it.
The terrain is 500ft x 500ft.
(Btw, the trees in the top right corner of the render are the original models used in the replicator. )




Comments
My first thought is that the hot-point has somehow been moved.
To move the hot-point, you select your object, CapsLock on - move hot-point to the base of the object.
Replicator settings may help as well. Those trees that are off the terrain raise red flags about the hot points as well. The bounding boxes look huge.
The bounding boxes of the actual trees look okay (to me anyhow), as do the hot points - all at the base of the trunk. But those replicated bounding boxes, while probably the correct height, look to be 300ft across!
The tree heights are set to 50ft (oak), 40ft (chestnut), 30 ft (rowan)
Are they individual trees or are you replicating groups?
Not sure if this is an issue, but I notice that we're on the 1.5 second timeline. Perhaps the trees were inadvertently moved around causing keyframes to occur? This might be messing with your results.
Try eliminating any keyframes that do not lay on timeline zero (00:00) (But don't delete those on 00:00, or you may lose your trees)
Stay at Frame 00:00 when doing anything tree-related. Be sure to move the original trees to where you need them at that zero frame.
Tip: It can help to raise the hot point slightly up the trunk to get them to sink into the surface a little.
Tip: Be careful when dealing with animated features like wind speed, as it can actually move your tree.
Good point EP
When looking at the first picture in this tread, it looks like the threes are replicated as a group.
They are just 3 individual trees.
Dartanbeck, that was exactly the problem. I'm still somewhat fuzzy on the whole thing of keyframes and stuff (I don't even know how the thing got to be moved in the first place), but when I pushed it back to zero, I discovered the terrain was scaled to a completely different size! Anyhow, now I can work on some other plants and do something about that awful ground shader!
Cheers :-)
Glad you got t figured out. If I weren't still getting over Typhoidebolafluenza™ I may have noticed what our illustrious and observant Dart pointed out as a possibility!
I'm technically in my sick bed with that and a side order of strep throat!
Having reset the time clock, I've now found that much else that was in that scene has, um, "creatively relocated", so if I'm still off tomorrow, I'll be hunting that lot down and fixing it.
Q: if a shader has changed between the old time position and 00:00, how do I go about getting that change applied to the earlier instance (ideally short of recreating it from scratch)? Same goes for other things like modelling changes...
Glad it helped!
I'm technically in my sick bed with that and a side order of strep throat!
Having reset the time clock, I've now found that much else that was in that scene has, um, "creatively relocated", so if I'm still off tomorrow, I'll be hunting that lot down and fixing it.
Q: if a shader has changed between the old time position and 00:00, how do I go about getting that change applied to the earlier instance (ideally short of recreating it from scratch)? Same goes for other things like modelling changes...
To find nested keyframes in shaders, as an example, you'll need to go to the sequencer (timeline) and scroll down to Master Shaders and find the shader you want to check, expand it to reveal hidden keyframes. The same principal works for objects and scene effects. If the state of the shader you want to keep is further along in the timeline, you could delete the keyframe at frame 0 and slide the later frame back to the first frame. If the state you want to keep is at the beginning of the timeline and you want to get rid of the later keyframe, select it and delete it.
Warning! If you delete the frame 0 keyframe for a rigged figure, it will royally screw it up.
Sounds like experience????
Thanks EP. I don't have any rigged figures, but I'll bear that in mind.
Meanwhile, it's no Howie Farkes scene, but I keep plugging at it... :) (those trees are hideous ugly!!!)
Sounds like experience????
Affirmative. It's like you remove constraints then shove a virtual grenade up a virtual sphincter.
Affirmative. It's like you remove constraints then shove a virtual grenade up a virtual sphincter. ...and this is from experience too? :grrr:
Oh... and Tim,
It's looking very cool, sir!! Very cool!
Fun With Replicators... ;)
(Kinda goes to pot when I turn on GI though - over 2 hours to render a thumbnail, and practically no light gets through those trees)
Try this:
Turn off the scene ambient light.
Turn off GI, including Skylight.
Keep the Sunlight or add one.
Make a sphere in the VM. cut it in half and reverse the normals. make it invisible.
Set up a distant light to use light bluish color (not to saturated) and with a 4% to 6% intensity. Try lowering the shadow intensity to around 90% or 85%. If it looks bad, try a 100% intensity.
Use a surface replicator to replicate the light onto the invisible dome. Try 50 replications to start. If there are to many shadow artifacts take it up 10 replications at a time.
To simulate reflected light from the ground, you could aim a single distant light straight up with a 10% intensity to start, and greenish color, then exclude the terrain from the light. You could also try lowering the shadow intensity 10% or so. Note that you will have a better result if you take the time to use spotlights or shape lights to provide reflected light in key areas rather than a generic approach with a single distant light. The distant light works great for long shots or a general reflected light.
Your set is looking pretty darned nice by the way!
Thanks EP. I've got a render running with your suggestions implemented, so will see how it turns out.
My biggest problem is, I'm an inveterate tinkerer. I can feature creep a single polygon into an entire city block and still decide "it needs an extra something" What I really need is to be able to finish it!
This is with the fake GI that EP suggested.
Now I need to seriously optimise those trees to get the render times down. This render took 90 minutes on the lowest accuracy settings, and that's after I converted the chestnut leaves to polys (34 polys per leaf, just don't get too close!). The transmapped version was going to be a 6 hour render! The other trees are rowan and oak, and their leaves don't lend themselves so easily to being straight polys, at least not without a high polygon count.
Did the light idea work okay for you?
I prefer not to use transmapped leaves if I can. Real geometry renders faster.
If you're using translucency on the leaves, that will also crank up the render times.
Yes - this is the first full size render I've produced with the new lights, and I think it looks pretty good. :coolsmile: With real GI, a 200 x 133 thumbnail took over 2 hours - if I'd tried to render full size, I'd probably still be waiting!
I do have translucency on the leaves, it's a quick enough job to turn it off and see what difference it makes. Fun, this :)
What a difference translucency makes! Both to the render time and the output. The only difference between this picture and the previous one is that translucency was turned off on the leaf shaders.
Render time was 7 minutes 38 seconds!