wrinkled plane and wrinkles bump/displacement map
it's this image, click on it and save it to disk
because the ( too ) few times i added wrinkles to clothes models it always improved the look
i also posted the high polygon count object that was used to generate the bump map
https://sites.google.com/site/mcasualsdazscripts5/mcjwrinkly
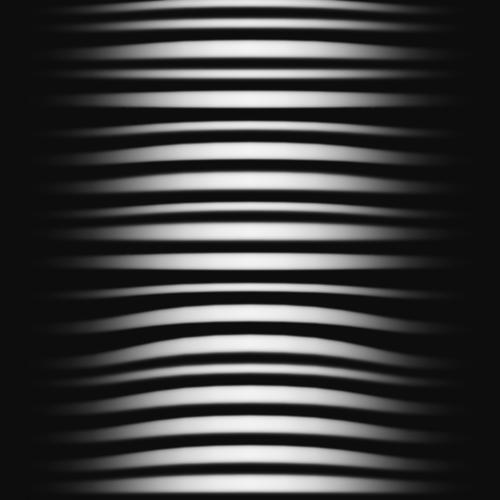

mcjWrinkles001blur3Hz.jpg
2000 x 2000 - 431K
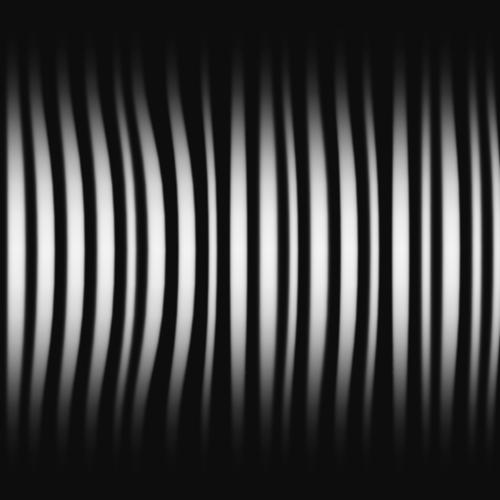

mcjWrinkles001blur3.jpg
2000 x 2000 - 442K
Post edited by mCasual on


Comments
applied to a 1m x 1m plane with displacement strength 100%, min 0, max 2cm
in case you didn't know, i have a script for DS 1,2,3,4 which can convert a displacement map into the-real-deal-morphs on a figure/prop
https://sites.google.com/site/mcasualsdazscripts/mcjelevate-reva
-------
quick lazy test
eventually i'll spend an hour to get a more credible wrinkle uhh composition :)
Wow just great :) thank You.
the object i created to make the bump map
in blender
warped and subdivided further
Very interesting, btw where is that object, can it be downloaded and used in DS to make more similar bump maps?
nm - time for a break lol ...
Thank you Casual :-)
the object is in a zip file named wrinkly.zip at the bottom of the page
https://sites.google.com/site/mcasualsdazscripts5/mcjwrinkly
you also need the grayscale ramp image on that page
then you apply that image to the object's diffuse channel and
set ambient 100% and render this from a bird eye view camera
if you wanted to create your own wronkles, you could use
1 - create a wrinkled plane
a modeler like Blender
or
mcjElevate
or
a primitive plane and dForms
or
mcjWarp
2 - use the mcjPlanarUV script to project the UV coordinates from a side view camera
3 - apply the grayscale and special surface settings outlined on the mckWrinkly page
4 - render from a bird eye view camera
-------
ex:
1 - zebra top camera view - note how the depth of the zebra is aligned with the Z axis
2 - exported as a re-uv-mapped object (non-distributable by the way) using mcjPlanar uv
3 - this grayscale ramp, vertical tiling -1.9 tiles, vertical tiling offset 0.05 ( 0r -0.05 if you render the other side )
4 - the reUVed object with this ramp, 100% white ambient, 0% diffuse strength - one pure-black-light in the scene,
well this planar UV trick is not often seen
you could make cameo pendants of your favorite characters and zebras
or oversized belt buckles
Thanks for explanation, very interesting indeed. I need to try this, to be honest I still am not practiced to make bump maps and make them work but should try definitely :). Thanks again for bits of wisdom ;)
well this planar UV trick is not often seen
you could make cameo pendants of your favorite characters and zebras
or oversized belt buckles
That is so kool. :-)