Creating Closed Clothing in Hexagon
 Rune
Posts: 5
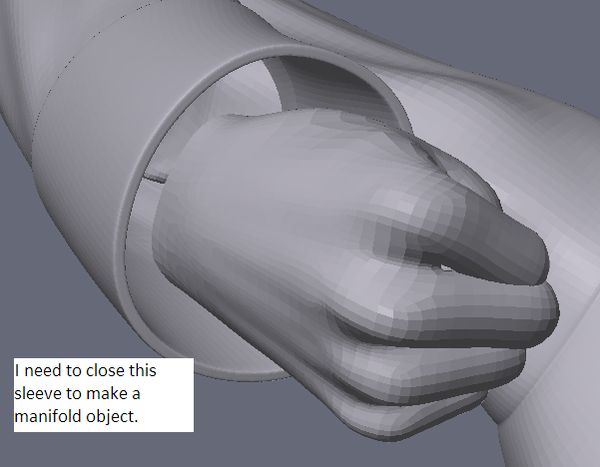
I am making a miniature for my son so I can 3D print it, using Gen2Male and Kung Fu HD clothes. I went through a tutorial which explains things in Blender using older clothing which is only 1 layer thick, but the Kung Fu HD clothes seems to have more thickness to it.
For example, the cuff in the sleeve where I want to close the hole between the sleeve and his wrist, seems to curve in under the cuff like a real jacket.
So the higher realism with Gen2 is causing problems for me :)
The miniature will only be 30mm tall, so detail isn't an issue, and I've already deleted the parts of the figure that aren't visible under the shirt. The figure seems to decimate pretty well, but the jacket and pants sure won't.
Is there a way I can close the cuff on the wrist or I am I just in for a LOT of vertex editing until I get it down to one layer? Will Hexagon be able to make the shirt thinner?


Comments
Maybe use the bridge tool to connect them?
Can you give me a step-by-step on how to bridge two objects and where to find the Bridge tool? I hate the fact that all the links to Hexagon tutorials or manuals are dead or on the old Artzone site with the images all missing and a bunch of dead links.
Seriously, I paid for this product and it doesn't even have an up-to-date manual? What have they been doing since 2.5 was released anyway?
In all fairness, $20 per copy doesn't hire a full-time technical writer :-).
Here are the relevant links:
User Guide
User Guide Videos on YouTube
Hexagon Bridge Tool Video
Hexagon Bridge Tool with Extended Selections Video
Before you try the Bridge option select the lines (inner cuff and end of wrist) and copy & paste them. The bridge tool will only work if both parts have an equal number of edges.
Is it possible to extrude the cuff inward so it blocks off the opening, or extrude the arm into the sleeve.
Oooh, I like that idea much better than bridge tool. Extruding the edges yourself will give you control over the topology. Because the cuff and the hand don't come from the same model, they're likely to need some adjustment to get them connected.
Then again, because you're going for 3D printing, the topology can be messy I suppose, as long as it's closed.
I have no idea if this a good idea or not for modeling for 3D printing, just an idea I've had on mind for awhile, decided to put it to paper for you and others if it helps, great. If it's a total wash, send me PM and I'll take it down.
Other Modeling Ideas
One option would be to use the Close Hole tool. 3D Printers usually don't care if there's any N-Gons.