Genesis Figures - Custom Conforming Eyebrow Prop Not Always Follow Face Morphs
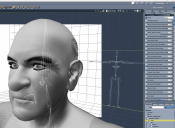
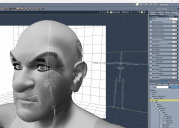
Greetings. I am creating some conforming props for the head of Genesis 2 Male to serve as bases to grow Carrara dynamic hair. I modeled planar brows, mustache, etc and used the free plugin Daz Studio transfer utility to create the conforming brow and mustache. To test, I dial-spun a G2M mixed character from morphs available at the 'actor' level. My creations conformed as intended. Yay. However, the conforming props I created only follow some of the morphs. In the attached you can see that the brows did follow the 'alien' morph, but did not follow the 'dwarf brow' morph. Booo. I have not been able to identify a pattern, but sadly the brows are not following expressions. Has anyone else encountered this issue? If so, do you have a solution?
NOTE - In the attached pics, my conforming brow prop is the darker color. I have created a shader domain of the mesh brow area and set it to a lighter grey. Hopefully, that makes it easier to see that the my brow prop is following the alien eyebrow morph but not the dwarf eyebrow morph.


Comments
you need to add the morphs also in the animation
unlike the later figures with bones
there is an option in the transfer utility to add favourite morphs, just icon the ones you need first in parameters
see https://www.daz3d.com/forums/discussion/34706/viseme-morphs-in-beards-the-obvious
and https://www.daz3d.com/forums/discussion/comment/541750/#Comment_541750
Thank you, Wendy. Great help as always. The links get to the heart of the problem. Anyone following along, here is the specific comment which attempts to explain how to get expression morphs included in the transfer utility. Yikes! Among the issues, the expression morphs are 'hidden properties' in Daz Studio. Argh.
https://www.daz3d.com/forums/discussion/comment/542249/#Comment_542249
Plan B - hair growth texture maps
For my purposes, I think I will be better off growing the Carrara hair directly on the figure mesh. One reason I generally try to avoid that solution is that the most direct way is to select mesh polygons for the growth area, but then the edges of the hair are typically jagged. The way to avoid the jagged edge problem is to grow the hair by texture map instead of by selecting polygons, but that requires image editing that is not easy to make multiple adjustments. But I think it will be less tedius then going through the list of hidden morphs. Yikes.
the way I do it is a tad simpler than Kitakoredaz's workflow,
my default is show hidden anyway
using favourites rather than transferring active morphs as I did back then makes sure you get all the ones you need for other projects
not all might have been used in the expression or animation in the current scene
in edit mode move the morphs to the head
(rightclick parameter bring up property mover find head in expanded hierarchy )
you then just apply the same pose, lipsync, expressions or mimic to both figure and attachment
Thanks again, Wendy. Something to keep in mind for next time. Here, I have an example of a hair region map for the eyebrows for the face domain for G2M. That map gos on the 'density' channe of the hair shader. And then here is that dwarf brow that didn't work above. I made it even more extreme. Solves my immediate problem.
you do know you can actually paint density maps right on the mesh in Carrara too
both in hair room or 3D paint
Thanks for the Heads-Up !!!
yup.