PhotoPrep coming Soon (Commercial)
 info_b3470fa520
Posts: 896
info_b3470fa520
Posts: 896
“After just over a week using PhotoPrep, I’m finding it quite useful in my workflow, particularly when using slightly off-center face images, and especially, on images where there is a low hairline (i.e. bangs over eyes, covering the forehead), as well as on faces partially covered with long hair close over the eyes. Yes, I have incorporated PhotoPrep into my workflow, and it has opened more photos to me. I found a decent ¾ view photo that FaceGen will not handle. FaceGen can work with a slightly off-center photo, but not a three-quarter photo.
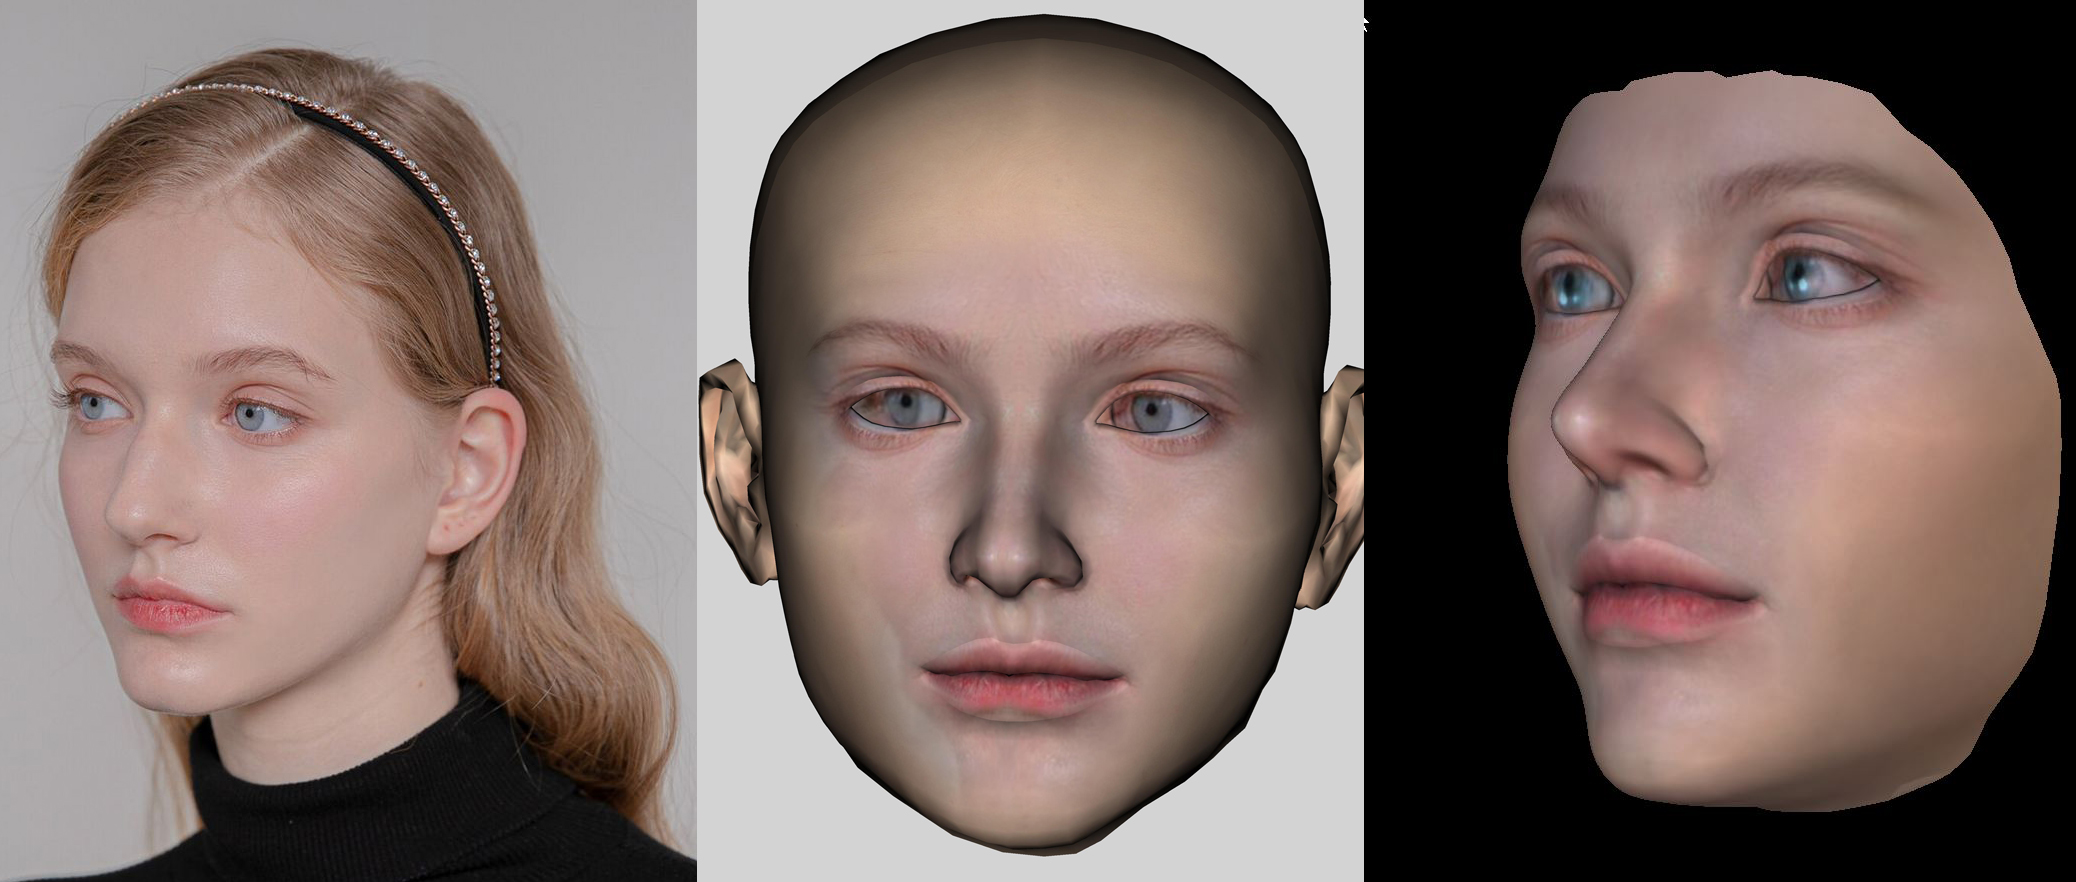
I used PhotoPrep to create the “proper” front view and mirrored right to left.
Then, I used FaceGen to create the head“
Felix Rodriguez
Description
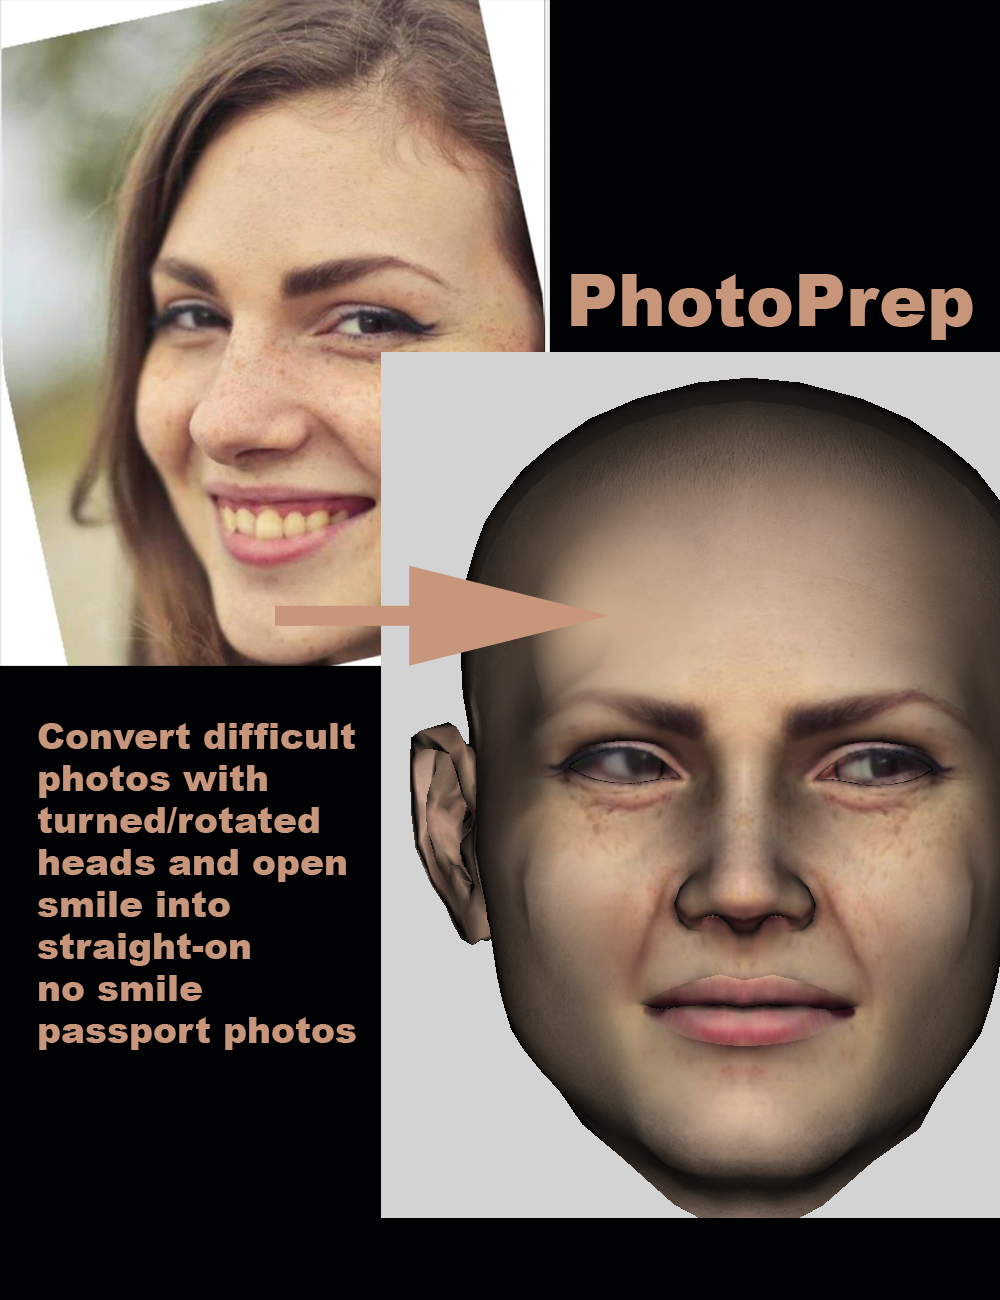
Why You Might Need PhotoPrep?
If you use Photo-to-3D applications, you noticed that some applications limit the type of photo you can use to “passport-type” frontal photos with even lighting and without open smile. This severely limits your choices when browsing for a photo for a 3D figure.
PhotoPrep helps here – it turns photos that are rotated to the side to a frontal 3D image. It also has mirror tools that mirror the side that is well lit. In addition, it closes open smiles and also has retouch tools to fix items like leftover hair or other artifacts.
Turning rotated heads or poorly lit photos or open smile into high-resolution (4000×4000) JPG images makes it easier to create 3D heads in applications that otherwise could not handle such photos.
We also included LoveChild, an app that morphs between two separate photos. See video: https://youtu.be/mG_chi4cd88
(Title edited by mod)
Daz 3D is part of 
Connect
DAZ Productions, Inc.
7533 S Center View Ct #4664
West Jordan, UT 84084
Licensing Agreement | Terms of Service | Privacy Policy | EULA
© 2025 Daz Productions Inc. All Rights Reserved.
Comments
See video of how PhotoPrep lets you use pictures that you could not use before: https://youtu.be/mG_chi4cd88
Looks interesting.
Sometimes I got dark smudges or miscoloration on the face after conversion to 3D model.
Could PhotoPrep help in such cases?
It all depends (there is a retouch tool that can help). The main attraction of PhotoPrep is that it removes the need to start with "passport" photos as required by FaceGen or FaceTransfer. In other words, you can start with rotated heads or photos with open smile/uneven lighting, etc. About half of the photos are of these variety, so it iis handy to have a tool that converts unusual Non-passport photos.
Dear Sir or Madam,
Forgive my ignorance or stupidity. I purchased Photoprep and it downloaded via DIM. Now, how do I start the app? I do not find it in the Windows start menu program or inside Daz Studio. Am I supposed to installed it manually from the zip file downloaded through DIM and run it manually?
Thanks in advance.
In DIM, on the "Installed" tab, right-click "Photorep with Lovechild" and select "Show installed files", Click one of the files and Explorer should open up and you can go back a few folders to find the exe. For me the path was:
"C:\Users\Public\Documents\My DAZ 3D Library\General\Abalone LLC\PhotoPrep with LoveChild\Application\RH.HeadShop.exe"
I created a shortcut and put it on my desktop.
Thanks for the input. I can now give it a test run.
Running the .exe produces the ad banner (first picture in this thread) then after a wait this window:
It says "Creaet New Project" in the title bar but that seems to be the only complete phrase there. For example, "If you want to create a 3D head based on a single". I tried resizing the window, it doesn't help. There are no pop-up menus anywhere. The "?" button toward the bottom right opens a browser window on a checkout page on "printahead.net" with the phrase "This is somewhat emabarrasing, isn't it?" prominently displayed:
The "play" (right triangle icon) leads to an advert on YouTube for AI stuff. It's a very long advert and skipping to the end of it leads to some other product (not Abalone so far as I can remember, but I can't stand the idea of seeing that advert again). The "information" icon just redisplays the original ad banner.
Dragging a 480x480 mugshot picture into the "jpg" wiindow (why only JPEG?) creates a truncated view. Dropping a second picture there does nothing. Switching between "Sinole" [sic] and "Love" modes results in the original picture being displayed in full. At this point the "Apply" button does nothing (i.e. a click on it does nothing) and the same is true if one of "Mal" and "Fe" is selected but the "play" icon still leads to the same YouTube ad.
I did manage to get "Apply" to produce something once but I can't repro that behavior and there are no instructions. The product page "readme" link leads to:
http://docs.daz3d.com/doku.php/public/read_me/index/99954/start
That page is almost entirely just a copy of the product page advert but it does contain the plaintive assertion, "For usage instructions read the enclosed README pdf." There is no "enclosed" README.pdf - I checked all the installed files and the link immediately after this text leads to a web page with the word Forbidden. The link is http://docs.daz3d.com/lib/exe/fetch.php/group/read_me/staging/99954/photoprep_readme.pdf and this is the web page:
Are you running in 4k?
Looking at your image of the interface it looks like text scaling is too large for the app and the text does not fit. My interface says "Single Image" and has more text at the bottom next to the "Male" and "Female" icons.
I think the scaling might be why your imported image is zoomed in too.
I used ImageMagick "Mogrify" to convert my png portraits to jpg into another folder.
I open the app, after the splash screen, it disappears for a few seconds then the interface appears.
I click "Browse or drag jpg file", open the folder, select my file, click Open.
I then see the image with blue dots marking facial features. ( They can't be edited or moved )
I click "Apply" and i get a "Please Wait" box with a green bar.
Then i get an app window with my image on the left and the created face mesh on the right.
I save the "front", "Left" and "right" views as seperate images e.g. "Face-F-001.jpg", "Face-F-001-L.jpg" and "Face-F-001-R.jpg" in a named folder somewhere.
I then go to "C:\Users\USERNAME\AppData\Roaming\Abalone\HeadShop" and copy the "TempProject" folder into the same folder i saved the images above.
The Temp Folder contains folders with the obj and mtl files and textures, i assume i can use them in other apps.
"No Smile" will close the mouth.
I haven't worked out how to get "Retouch" to work for me.
The two icons next to "Retouch" mirror the left and right sides on the final mesh if needed.
"Smooth" changes the mesh in the viewport.
"Hand" lets you move the generated mesh around in the viewport.
"Arrow" lets you rotate the generated mesh around in the viewport.
"Magnifying Glass" with up and down mouse movement zooms in and out.
"Magnifying Glass" with frame and arrows resets the mesh size and rotation etc in the viewport.
I have had some crashes and as far as i can tell you have to close the app and reopen it for a new project which is why i have a desktop shortcut.