Missing Toes With dForce Twilight Outfit
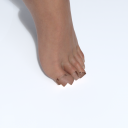
When I put the shoes from the dForce Twilight Outfit on a model, parts of the big toes and the two toes beside them disappear. Ordinarily, this would not be a problem, as the toes are hidden within the shoe. However, I wanted to apply a crystalline, translucent shader to the shoes for a project I'm working on.
Is there a way to make the toes visible again while leaving the shoes on the model? I can't for the life of me figure out how the shoes hide those parts of the toes.


Twilight_MissingToes.png
1300 x 1300 - 2M


Comments
The shoes use a geograft to hide unwanted polygons, in this case the toes, so that the user does not have to squeeze them inside the shoes everytime. It's easier than making a morph to make them fit. The thing is, it seems once the targeted faces are included in the autohide for the graft with the shoes, they can't just be removed. Some polygon somewhere on G8F must be sacrificed in their place. So, let's start with loading the shoes onto G8F.
Find a polygon somewhere on G8F that will not be missed, like maybe the back of the tongue or throat, or some area that will always be covered. With the Geometry Editor Tool, select that polygon. Right-click, navigate to "Geometry Assignment" and select "Set Graft Faces for Attachment..." and then repeat for "Set Auto-Hide Faces for Attachment..."
This will set the new polygon as the one to be auto-hidden when the shoes are worn. (The hidden polygons are stored in the shoes, not G8F, so unless you save the shoe geometry, the hidden faces will revert to the original, i.e., the toes, if you remove them and add them in again). Normally the workflow is to save the modifications and reload it (Save As... -> Support Asset -> Save Modified Assets... *WARNING* this will overwrite the original geometry file and cannot be undone, but you can always re-install). If you want to see the results immediately (if only to check if it works), right-click again, navigate to "Geometry Visibility" and select "Show All Polygons". This should toggle the original hidden toe polygons ON, and hide the new selected "graft faces for attachment". You can proceed to try to squeeze the now-visible toes inside the shoes...
(I hope I got that right. I had to go through it a couple of times to get it all)
Another option is to actually edit the geometry file to remove the graft section, but that is unknown territory for me. Could be tricky, or it could be as simple as deleting one section of data.
Thank you! This did the trick.
The way of editing DSF file to remove auto hidden graft, as an alternative ~~
I don't have Notepad++, anoher way?
Using windows Notepad will also do ~~ but still suggest you install Notepad++ which is much more powerful and a freeware ~~
https://notepad-plus-plus.org/