Daz > Blender > I just want to boolean the eyes (Or get a solid mesh to 3d print)
I'm very nearly able to get from daz to my 3d printer with minimal steps. I have even found a (rough) solution to get hair to work (iconosphere shrinkwrapping in blender) but I am not proficient in Blender at all, and following specific steps.
My issue is Daz seems to export the model as one object, but the eyes and pupils and teeth are all still....separate objects? I just want to fuse the eyes to the skin and not have the horror show underneath. Is there any way to either export from daz only the external verticies, or an easy method to boolean the eyes so I can have a manifold mesh of only 1 object of linked verticies I can send to my 3d printer?
I do not want to use the daz > blender bridge. I want to pose in daz and export the .obj file, and have minimal cleanup in blender before using their 3d print tools to clean the rest up. I'm just not very skilled in blender and dont know what really even to ask. I'm sure its simple but I'm lost.
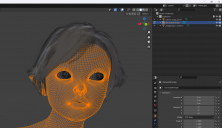

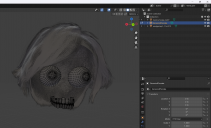

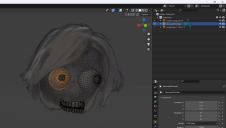


Comments
Remeshing the figure seems to be the best way to go, back to working on the best way to shrinkwrap and remesh the hair.
New steps for those that want them:
Pose in DAZ, export OBJ, import into blender, select model > remesh > voxel, .005 (i dont need it super smooth since I will be printing it small, but remeshing at voxel .002 looked pretty good too)
Make a high density iconosphere (new object, icosphere, modifier, subdivisions x6) center the ico over the hair, add modifier deform shrinkwrap, type projection, negative checked. Then remesh that and boolean to the body. Use 3dPrint tools to handle cleanup.
After you have it imported and your ready to export for printing duplicate your character and then hide the old one. This is just incase there is a mistake.
Select each component and hit alt + P > keep transforms. This will unparent the mesh from the skeleton.
Once you have done that for every mesh you want to print select them all and join them ctrl + J. That will make them all one mesh.
If you want manifold geometry create a cube. Scale it so the newly joined mesh is completely inside of it. Add a multi res modifier and then a shrink wrap modifier. The multi-res will add sub-divisions, the shrinkwrap do as is sounds. Applying the modifiers (starting with the top one first) will make their affects permanent. I recommend doing this in steps. Increasing the subdivisions gradually as you go. This will ensure you get detail where you want it. Basically its what you are doing with the hair. You use the cube because it is easily subdivided and properly. ICO spheres make a mess.