Released: "A Touch Of Dirt For Iray" (Commercial)
 V3Digitimes
Posts: 3,203
Temporary warning: For now, do not use or render this product using the Daz Studio public build (4.9.3.71). It would result in a crash.
The product works as usually on the current release version of Daz Studio (the "normal" Daz Studio version).
The reasons for the crashes on the public build are being studied in order to solve the issue as fast as possible.
A Touch of Dirt For Iray is out : http://www.daz3d.com/a-touch-of-dirt-for-iray
You have a ReadMe file detailing all this, but.. Who read the ReadMe's? This is why I make the small briefing on how to use :
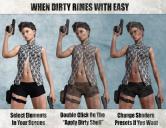
1. select all the figures and objects you want to add dirt on.
2.a. Users of Content Library : in the main folder of the product (shader presets/ V3D/ A Touch Of Dirt For Iray) double click on the script named V3DPD apply Dirty Shell. For figures, the parts of the shells corresponding to eyes and inner mouth are already created "off" (for figures from generation 4 up to Genesis 3). You can also add an overlay on a human figure (with human proportions) using the dirty decal node of folder 04.
2.b. Users of Smart Content : in the product, double click in "utilities" and double click on the script named V3DPD apply Dirty Shell. You will also find a decal node in the "props" subcategory.
3. Once done, when you want to modify the shaders of the dirty shell, you can load presets (full or partial - color - opacity -) organised by folders for "Content library" users, and set "all together" in the shaders cateory of this product (I think I'll update the metadata), for "Smart Content Users". See remarks at the bottom to understand better the clues in the names of the shaders.
4. You can also use the script V3DPD manage dirt base to modify the shaders, this will give you a more synthetic overview of the colors, colors mixings, and noises parameters.
5. If you want, you can transfer Opacity, Displacement, normal and bump maps from the parent of the shell to the shell. The shell itself must be selected. The only "mandatory" transfer is the one of the displacement if the underlying object has displacement on it. (You'll the only have to set up the min, max and SubD). The procedure is shown in video help files (links at the end of the pdf ReadMe file).
For everybody :
- Take care : the "colors only" preset will change only the colors of the dirt. You have to use them on an "already dirty" element (shader V3D Procedural Dirt 01 or V3D Procedural Dirt 02) otherwise nothing will happen. The shaders files named with "Color" will change only the color, the shaders files named with "Opacity" will change only the repartition of the dirt, the shaders named with "full" will change everything (color, repartition, opacity, tiling). Opacity and Full Shaders can be applied without applying any other dirt shaders before. All of the shaders will preserve the additional maps you might have transfered from the parent to the shell. In the shader presets names : PD1 means that the shader 01 will be used, PD2 the shader 02 PD will be used, PD means the existins shader you have will be maintained.
- Do not Apply the shaders directly on the figures or objects to have a dirt effect. You have to apply them on shells or overlays : select in the scene the Shell or Overlay "wearing the dirt", then the surfaces of it, then apply the shader. Yet you can apply them directly on figures if you decide to used them with a constant "1" opacity, for instant to generate surfaces covered with procedural patterns.
- If you work on dirt, you can set the shells and overlays "selectable" in order to be able to select the surfaces directly using the surface selection tool. This allows to go faster in the selection.
- The links to the video documentation can be found at the last page of the readMe.
***************************************************************************************************************************************************************************************************************************
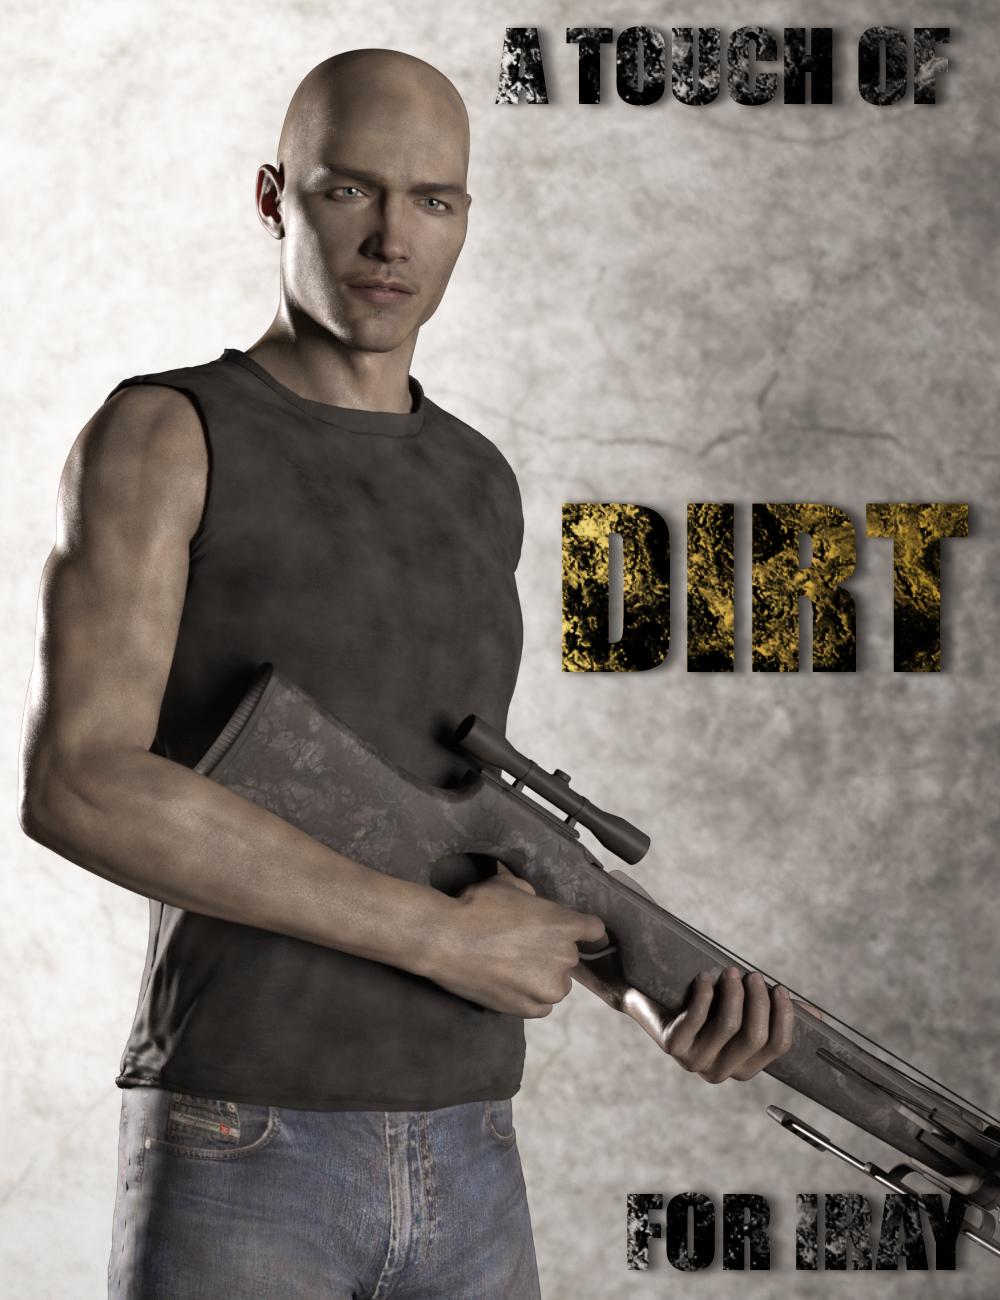
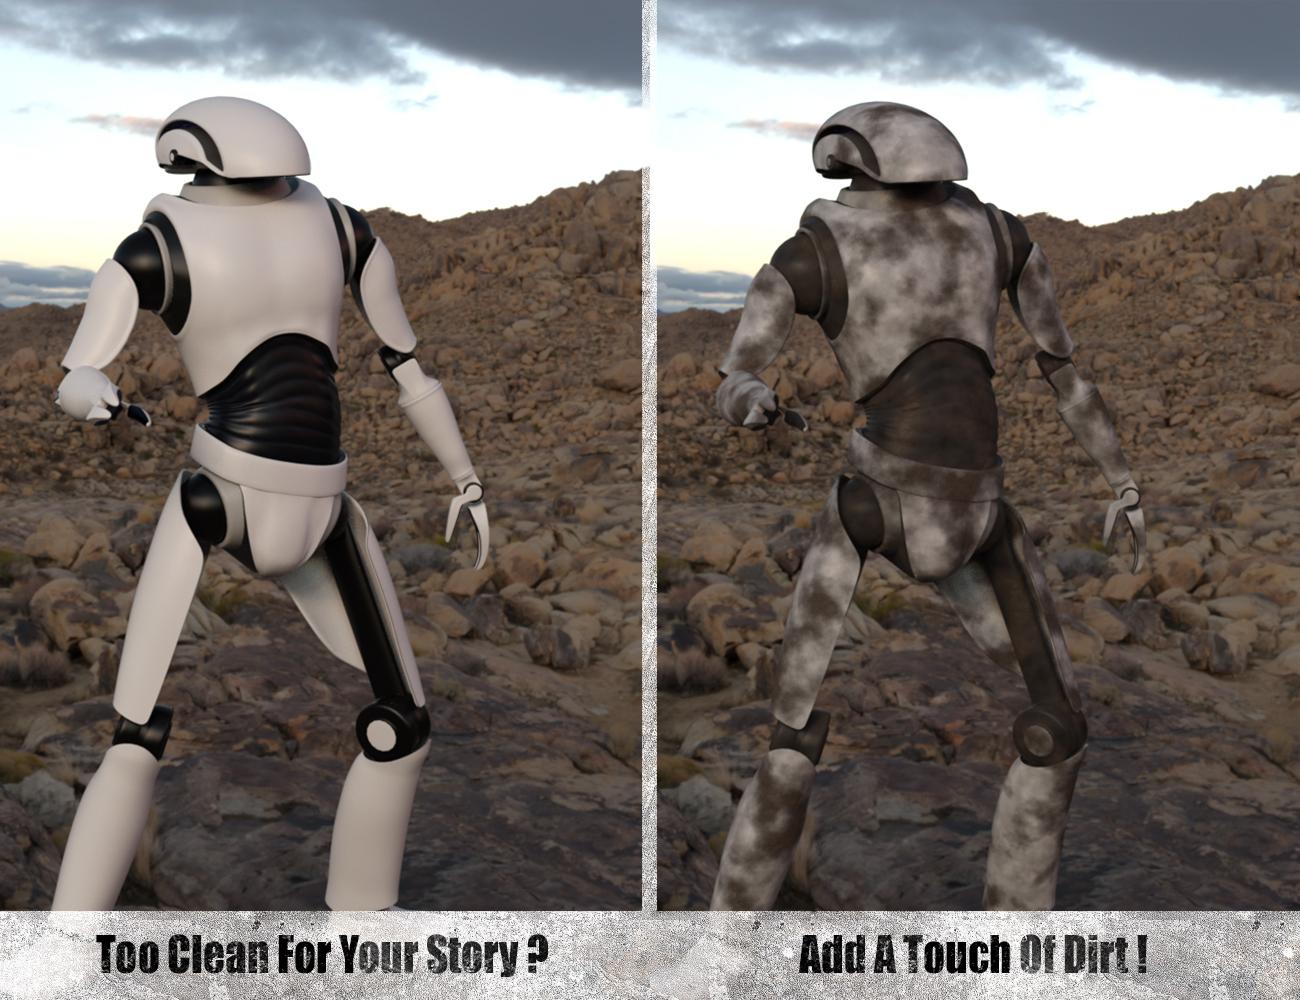
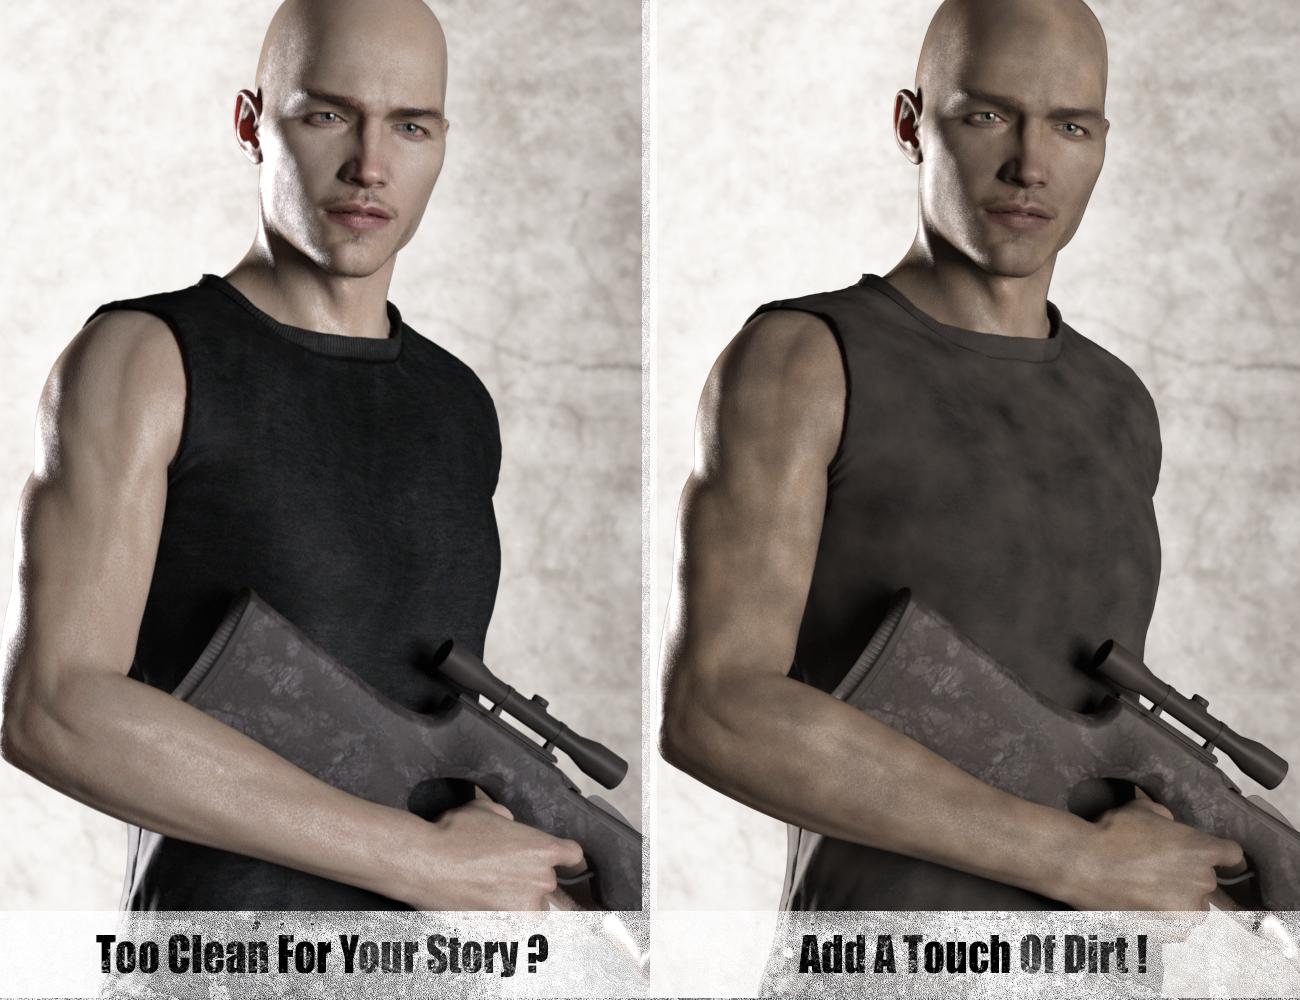
A touch of dirt for Iray will add dirt to any figure or object in your scene. I had this idea because I saw so many clean figures, in their clean outfits, holding and surrounded by clean props, but rendered in dirty environments, or rendered in circumstances they should not be "that clean".
It is based on the geometry shell technology, and the dirt relies on two specially hand made procedural Iray shaders providing a completely seamless dirt pattern on the elements of the scene you have selected, meaning that the result is completely independent of the UV set - and of course seamless!
All the tools are provided to make the process easier :
- A first script will apply the dirty geometry shells to all the elements you have selected in the scene.
- A second script provides an interface helping you to manage the dirt properties easier than it is in the surfaces tab.
- A third script can copy the essential maps and maps strengths of the current parent figure of a dirty Geometry shell to the mapped properties of the shell.
Indeed the shaders allow the possibility to include some maps too, working together with the unmapped procedural properties. The properties which can be mapped are normal, displacement, bump and opacity.
- The product also includes full dirt shaders presets, partial dirt colors only shaders presets, and partial dirt opacity repartition only shaders presets so that you can mix easily dirt repartition and dirt colors.
Using dirt can completely change the story you tell in your scenes.. So... Add a touch of dirt!





Comments
Aye, I'll be down for this :)
Looks great!
I need this:-)
This is a definite buy. I want to head over to the store right now! (Too bad it's not out yet.)
Thanks!
Looks... dirty XD
I think I'm gonna submit really soon... It should be for my store anniversary.)
I have to recheck all the files (I configured presets so that the dirt shader presets don't change the additional maps settings you would have added), and finish the promo images. Maybe I'll make a little video tutorial, and this is done...
Well, I'm doing as fast as possible, to have a product "as clean as possible" (which is strange for a "dirty" product)...
Thanks for all your comments, this is very encouraging. At the end of such a project it is sometimes hard to find the energy to go further, but reading these comments gave me a boost! Going back to work!
very cool...just what i was looking for earlier today.
I like this! IT looks useful!
Yet another must-have, V3Digitimes :-)
So just to clarify, after applying the shell we can increase or decrease the (opacity?) amount of dirt? And is it possible to have some surfaces dirtier than others? For example, in your pic of the guy holding the gun, if you wanted to make his hands dirtier than his arms would there be a way to do that?
Looking very good!
Thanks, that's what I was looking for a while!
Yep. Daz people and the props are too clean! Let's add dirt everywhere! Hurray for the dirty world, the reign of the soap and of the detergent is OVER!!!! Muahahahahahah!
Hi Leander! Thanks a lot. I am impatient to see the renders you will make with these! (Sometimes I tell to myself I should ask you to make my promo images, technically I'm OK, but artistically... hmmm...)
You can increase and decrease the opacity. There are several ways to achieve this.
First way directly by the opacity strength dials : To make short opacity is defined by 2 grey levels perlin noises that you can blend with a type of blend you can choose and in a proportion you can define (or you just use one to start). The result of this blend is multiplied by a constant accessible in the surface tab (and the control interface). This "attenuated" or "amplified" opacity is then, if you activate "Also Use Opacity Map" once again multiplied by a mapped opacity (useful for leaves, hair, torn outfits...). You can then use also the strength of the mapped opacity to reduce the opacity.. Just take care, there are 2 shaders and there are some warnings if you use the second one : for this one only the opacity of the first opacity noise is driven by the "amplify opacity" dial (so in this case you have to use the "Also Use Opacity Map" trick to decrease both perlin noises opacities the same way).
Other way, by noise grey levels : You can also use the colors of the perlin noises use for opacity. Instead of going from 0 to 255, make the grey level go from 0 to 210 or from 0 to 180. This way the max opacity coming from the noise will be lower than 1 "whatever strength" you use afterwards.
Other way by colors : On the places the dirt is visible, you define the color of the dirt you want to use by 2 colored perlin noises (different from the opacity perlin noises). You can change the colors of the dirt to get something closer to the underlying figure or prop colors, this will attenuate the "impression" of dirt.
Now, making some surfaces of the body dirtier than others. This can be achieved, but with a bit of effort, different ways :
- The dirt opacity is basically procedural, but it can be mapped (opacity of the map multiplies with opacity of the procedural noises). So if you want some surfaces less dirty than other ones, you have to map their "mapped opacity" property - and activate "Also Use Opacity Maps". For the case of figure you mention, I would have used grey maps on all surfaces, and for the hands I woud have opened the texture map in photoshop "in order to have the location of what I have to paint"), then I would make a kind of gradient from the grey of all surfaces to white for the hands (well in brief), then I would plug the maps into the "Mapped opacity" slots. Well this is not a "one step" creation.
- One of my beta testers used a darker preset on the legs and on the rest of the body for one of his render, but the "transition" from one body surface part to another was hidden by the outfit (lucky boy!).This is the easiest when you can hide the transition between two material areas, then you don't have to bother more than that.
- The other solution I see is : you make 2 renders, one with a very strong dirt everywhere, one with a very light dirt every where, and on photoshop, you create two layers and then you use a mask to hide the "more dirty" parts except on the hands.
So the answer is : what you ask is possible, but this is not "an easy one step process".
Does it help, is it understandable??? (I'm for so long in these opacity noises vs color noises that for me it is obvious what's in the shader, but I'm not sure it is clear the way I wrote it).
Greetings,
So...if I took a nice prop, like say the Garden Wall, and added this to it, you're saying I'd end up with the Perlin Wall?
...
Couldn't resist. ;)
Looks great so far!
-- Morgan
ROFL! It took me a few seconds to understand...
Glad you could not resist it was worth it XD
Wow, what a thorough answer! Thank you so much.
I think I see what you mean, so thank you for explaining :-) - and doubtless I will understand it better when the product is released and I can play with it. :-D Can't wait to get everything looking just a little bit more lived-in... And thank you for the sweet words about the renders. I will try to live up to expectations *grins*
Please come up with some more really useful products like this!
This will come in sooo handy for the book i'm working on. It will save a lot of post render PS touch ups. No one should walk out of a fight looking like they just got out of the shower o_0
:) I'm gonna post more promo images in th next days, amongst them some of the control interface, it may make things a bit more clear. In the product there is also a help pdf file and I'm gonna make a short video (well, I hope "short") to show how customize the skin.
lol.. I also had the feeling that our fighters were forced to take a shower each time they entered Daz Studio viewport.
One more thing I wanted to add here before I forgot : The noise is re-calculated at each frame of an animation as a function of the geometry of the object. If you use only static objects, this is not an issue. But if you began to animate (rotate the bones) of figures, then the noise will change of location on the moving part. Or let's say it differently, the noise will not move as the arms moves when, for instance the arms move. So as a consequence, this product is for image renders, not for animations.
Now a few more images, these ones are the included " dirt full shaders presets", knowing that you also have access to these shaders as "dirt repartition" (where there is dirt where this is clean) and "dirt colors" (what noise colors are used by the dirt - where there is dirt) separately. This way you can mix dirt pattern 6 with colors 10, etc, etc...
Here are a few images of the interfaces. At the top you have three essential elements :
1. You can temporarily disable the "dirt opacity noise" (i.e. make your opacity constant) to set up the noise colors, and then you can re-activate it.
2. You can define the strength of the opacity (of the dirt 01 for shader type 01, of the whole dirt for shader type 02, or of the whole dirt for both if you have disable the dirt opacity)
3. You can tile ALL the noises (color 1, color 2, opacity 1, opacity 2, roughness, glossy layered weight, bump, ...) simultaneously. This is useful to adapt the scale of the dirt to the scale of your object in a single dial.
All these are also accessible via the surfaces tab.
Then in the control interface you have 5 "tabs", allowing to change the1. color properties, 2.color placement, 3.opacity properties, 4.opacity placement, 5.the last tab gathering the "More options" I was using the most when setting up my shaders.
I also add a new render here.
Greetings,
I wonder how well these can apply a little bit of grime/noise to hair...? In general, for things whose geometry is defined by more by opacity maps than modeling, how well does a geoshell solution work?
-- Morgan
Greetings :)
The dirt opacity is basically driven by a perlin noise - seamless - AND this opacity can also be multiplied by a mapped opacity (and I include the tool to copy the maps from the parent to the shell). The shells are set up with a very small offset. So in general, to add dirt to the hair you apply the dirty shell on it, and just afterwards, you transfert the opacity maps and strength from the parent to the shell. If the opacity maps are well done and if the geometry shell works fine, there should not be issues. You may want to change a bit the tiles and the base colors to have a better scale and contrast on the hair color, that is what I did in the image I post here.
Just as a comment, is what I remarked when gathering reference images (thank you "The Walking Dead"), is that hair is not often "dirty" : sometimes it is "greasy" and "dusty", sometimes "muddy". (except for some of the zombies, who have really dirty hair).
You're really making me want this, Vigitimes!
Thanks a lot!
I am presently updating the control interface and info popups in order to have one more dial which will allow a linear variation of opacity (well there is a readme and this is explained in the interfaces popups info, but depending on the shaders the two noises strengths are not driven the same way). So to make things easy and clear, I add the dial allowing a linear variation of "both" noises defining opacity strength. That's why I posted here at the WIP stage. To have the right questions... XD
Nice remark :) Thank you very much Timmins William.... Or I can call you Will! I had used it with decal nodes but I forgot maybe the "dirt addicts" would like this (and the masks) too. This is why it is now included in the product.
There is a decal for "classical" human figures included as an addon wearable preset, with several opacity maps (more or less round and sharp). Otherwise in the ReadMe there is a paragraph explaining how to add decals on other objects and figures, and how to change the shader on them or the border opacity.
At the end, it gives that. It also answers the question of Leander who wanted for instance some parts of the figure more dirty than others. Yes you can also do this using the decal nodes (in the limitations of course of how a decal node will wrapp or project on the support geometry).
Finally here is what it gives with 2 to 4 decal nodes, the "default" decal node mask with some of the included shaders (shaders and mapped opacity preset do not interfere with each other so you can try various mix easily).
This is going to be used so often it's not going to gather dust in my content .... ;)
ROFL! You cannot imagine how much of my content is gathering dust (even of my own content I developped at the beginning). I used to be a compulsive buyer, now I try to calm down, even if my mouse cursor is strangely attracted by the "add to card" button....
Presently I try to make things that people (and me) will have not because "the promos were nice" but because they really NEED it. When I use things so often that they finally fall in my "custom scripts", then it is the sign, yes, it is useful :)... I'm a fan of "The Walking Dead", and I was frustrated not to be able to make renders of the "survivors" easily (I had the environments, the dirt was missing). This is what decided me for this one.
This looks fantastic. Makes me actually consider using Iray for an upcoming render after this is released, even though I have an AMD video card. (I'm usually a Reality user.) Nicely done!
Thank you so much Fobok ! Well, working with processors only, you are probably going to suffer on Iray, but even renders can be long, what I saw is that when I used CPU only, the render time for Iray or 3Delight for a same scene is not so different. I have no clue to compare with reality, I had to stop reality for a while, even if it was very good, but simply for a matter of time.
I hope you'll have a look at Iray and adopt it as an alternate render engine. It is a very good render engine :)
Huge zombie fiction fan here. Am halfway through a book series and want to do some of the characters and scenes (especially a super smart 7 year old who has a stuffed zebra as a protecter personality) and thought I was going to have to do a lot more post work than what I am actually going to have to do with your product product. Very well done!
Thanks a lot !
I also came here to mention that the status of this "Dirty Thing" changed from "Ending WIP" to "Coming Soon".
Hello...
I just updated the main post with a small "how to proceed", because the release is really soon :)
For any remarks, feedback, questions, render sharing, please use this thread!
Coming VERY soon it appears as the store glitched out this morning, no matter how many times I clicked to get it into my basket it kept giving a 404 error until they took it down!! Possibly the weekend or Monday??