READY - Rendering daz studio scenes as skyballs ( equirectangular / spherical images )
https://sites.google.com/site/mcasualsdazscripts5/mcjsphericalcam
( if you downloaded the script on July 2 before 9 am eastern,
you may have the version that will fail the stretcher.bat phase
so get the new one that was posted a few minutes later )
the script animates your camera, over, say, 72 frames
you render those 72 frames
this render covered the entire environment sphere
then using the script, the mcjSqueeze and imagemagick utilities, it assembles a mosaic/panorama
You then apply this as the texture on giant spheres and you get great fake backdrops/lighting for your scenes !
i added a few skyBall props as obj files, to be imported using Daz Preset ( scale = 100% )
those spheres have a 1 Km radius
their normals and UV mapings are ready for equirectangular panoramas
this is from the initial posting
it gives a good idea of the way the camera is animated
var cam = Scene.getSelectedNode( 0 );
var xr = cam.getXRotControl();
var yr = cam.getYRotControl();
for( var y = 0; y < 6; y++ )
{
 var XRotAng = 75 - y * 30
 for( var x = 0; x < 12; x++ )
 {
  var YRotAng = x * 30;
  Scene.setFrame( y * 12 + x )
  xr.setValue(XRotAng);
  yr.setValue(YRotAng);
 }
}


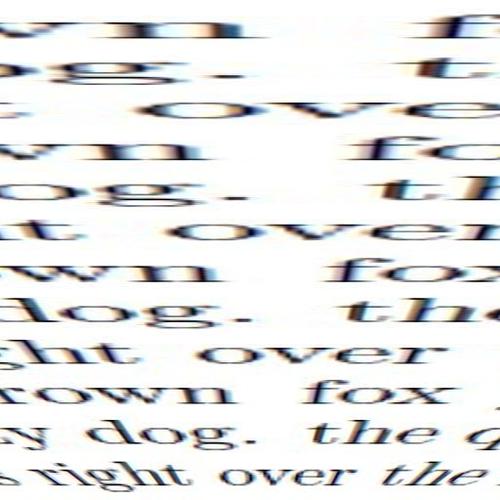
camon.jpg
512 x 512 - 40K


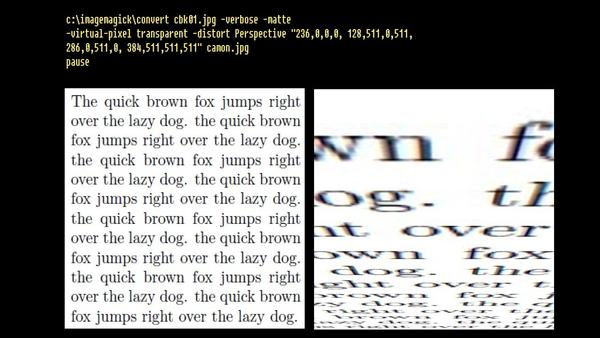
camon2.jpg
1280 x 720 - 146K


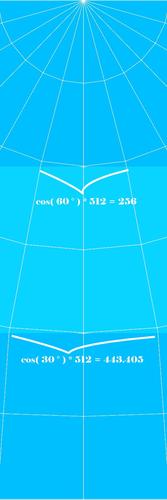
numbas.jpg
512 x 1537 - 70K


deform.jpg
333 x 2000 - 54K


sbks.jpg
1356 x 690 - 204K
Post edited by mCasual on


Comments
Sweet...
And if you rinse and repeat a couple of times, changing the 'exposure value' up/down, you can then run the results through something like Picturenaut ( http://www.hdrlabs.com/picturenaut/index.html ) and create your own HDRI...
thanks i didn't look much into HDR software
here's the first result
72 512x512 daz studio renders, deformed by imagemagick and assembled by imagemagick
the top row of image tiles seems to be mistreated by imagemagick
and there's problematic stitchings
but s'not all bad
Basically all an HDRI is, is a series of underexposed and overexposed versions of the same image stacked in a way that preserves the full dynamic range of the 'real' scene.. This is then usable as light source for rendering because it has 'real' minimum/maximum values...and in the best ones, a bit beyond what our eyes can actually see...and all the color and shadow information at the time the original shot was taken.
inside mcjCastle
hardware render ... so the lighting is ... well openGL'ish maybe if i turn specular off
still in mcjCastle but someone stole the ceilings and floors
fig 2 - applied on an environment sphere
even with a 6000x3000 resolution, since it covers a 360 degrees panorama, it's a bit blurry
so .... friday
because i want to figure if it's inevitable or not that the image has cracks ( or bad photo stitchings if you will )
well actually i suspect it's because my camera's Field of view is not precisely 30 degrees ) when the focal length is 65 mm
i think it may be 45 degrees when it's 35mm ... i have a long study of the matter .... in the old forum i guess
to quote myself
"about the focal lengths - in Daz Studio the focal length is relative to the vertical aperture of the camera for a backplate 35 mm tall"
so tan( fov / 2 ) = 17.5mm / 65mm
fov/2 = arctan( 17.5mm / 65mm ) = 15.0684882 degrees
so FOV = 30.1369763 degrees degrees
there you have it,
not 30 degrees
hence the cracks
--------
tan(15 degrees) = 0.26794919243
17.5mm / 0.26794919243 = 65.3108891 millimeters
we set the camera Focal length at 65.3108891 mm
well .... that's not quite it yet
( the 3d scene in this case is a 100 meters 24x24x24 Cube centered at 0,0,0 )
-----
Fig 2 - when applied on a sphere it looks perfect!!!!!!
see that's amy 100 metes down and away seen from the center of the cube ... oops, that's the real cube, not the sphere :D
Fig 3 - uhhhh that's not as glorious as Fig 2 :|
ONE LAST TRY FOR NOW ...
must be because we're dealing with curved trapezes
Cool. Overlapping the frames by a bit and using the pano tools in Photoshop or the Gimp would likely get rid of the seams.
i think i saw the word "spline" mentioned in the imagemagick deform manual so maybe i'll be able to use it
instead of the (un)Perspective types of effects
else i'll write an exe or daz script or something
there's 18000000 pixels to process so i will need a fast solution
i never tested the speed of javascript vs daz scripts
maybe daz script could do it in a minute or 2
----
interesting ( and sad )
processing 512x512 pixels using a script, 1 multiplication and 1 division
Daz Studio 1.8 - a bit more than 4 seconds
Daz Studio 2.3 - a bit less than 4 seconds
Daz Studio 3 - 15 to 18 seconds
Daz Studio 4.8 32 bit - about 26 seconds
Daz Studio 4.7, 4.8 64 bit - about 28 seconds
since i have 72 tiles to process .... it's out of the question
mcjSqueeze.exe does it in a fraction of a second but will only support uncompressed bmp and tga files
OOPS
Fig 1 contrary to what i was saying
they ARE straight-edged trapezes
Fig 2
but the proper focal length for 30 degrees slices seems to be almost 68 mm
Fig3
OOPS AGAIN
contrary to what i was saying
they ARE NOT straight-edged trapezes
horizontaledgey speaking
Fig4 nah s'ok to treat them as straight edged trapezes ( more facets would yield less distorsion )
but i must get the complete trapezes ... and i dont quite have that yet
Fig 6 hmm still not quite figured it
all of this seems fine
see that?
as the vertical angle of the camera changes, the same horizontal segment's width changes
which is not what the 3d simulator in my head was predicting
a 5 Km diameter sphere
whatever the diameter, the middle of the vertical edges are closer than the corner vertices
but the segment doesn't move, the camera doesn't change position .... the camera just rotates ... so what the...
I had to split the gif and load it as layers in Photoshop before I could see it, but sure enough.
Maybe the camera doesn't rotate around it's entrance pupil (often mistakenly called the nodal point)? It sure looks like parallax error.
I can't even imagine why that would be the case, but it's the effect you get in real photography when taking panoramas and the entrance pupil of the camera lens isn't centered over the tripod or within its elevation cradle.
http://www.vrphotography.com/data/pages/techtutorials/technotes/nodalptalign-tn.html
http://www.johnhpanos.com/epcalib.htm
there's the explanation,
if we wanted the sphere-vertex pointed to by the orange arrow
to stay on the right-side-wall of the pyramid ( aka view frustum )
we'd have to rotate it around an axis perpendicular to the blue line
but that's not what we have
we have the camera/pyramid rotating around an axis perpendicular to the green line
so what i'll do is, i'll mathematically render the vertices of each one of the sphere facets
make sure they are in the daz studio rendered images
and use that to cut out the rendered image
then i stretch it to fit a square-tile
code for the camera animation, 12 x 6 renders 360 degrees by 180 degrees
code to "render" the world position of a ball named ball
as seen from a camera named cam
which is located at (0,0,0)
only for square renders
rendered .... meaning ... a pixel coordinate
it's interesting to note that
when you have a camera at 0,0,0 pointing along the Z axis
"rendering" vertices is simply a matter of scaling the X and Y coordinates of those vertices by a number proportional to their Z coordinate
And once again, thanks!
markers for the tile image corners
using a 60mm lens we get each sky slice in the render frame
the script knows how to compute the rendered pixel positions of the triangle/trapeze windows
stretching those cutouts will be done either by imagemagick or by an exe of mine
---
let's see .... pixel coordinates for the first triangle-trapeze
px0 256 491
px1 256 491
px2 138 35
px3 374 35
hmm that does make sense
TADA !
i think i just have to tell imagemagick to work harder on the poles of the sphere
TADA Squared !
using imagemagick to deform the rendered tiles
BilinearReverse instead of bilinearForward
it looks perfect ( but probably aint)(but maybe is improvable )
Fig 2
remember that this is a 6000x3000 pixels image
here's a non scaled down 2000x2000 area of the image
i cant see visible defects so far
Fig 3 i loaded the GuardHouse that comes with Poser
here again i rendered in Hardware/OpenGL mode and the way the camera angles interact with Specular surfaces
created problems - so you'll have to either turn off specularity on large flat surfaces or render in software mode
animating the camera takes 1 second
hardware rendering the 72 512x512 tiles takes less than a minute
generating the batch file for the next phase takes 1 second
processing the 72 tiles takes a minute or 2 (batch file+imagemagick)
assembling the mosaic takes a few seconds (batch file+imagemagick)
----------
note that Renderman i.e. 3Delight have the possibility
to use a spherical render camera
sphere
Spherical camera projection. Valid parameters:
RIB declaration:
Projection "sphere" "float hsweep" [360] "float vsweep" [180]
so someone someday should make one for Daz Studio
if it's not already done
----
but my script solution has the advantage that you can render the Daz Studio tiles in Blender Cycles (
so the name is chosen mcjSphericalCam.dsa
you'll be able to create the camera animation in Daz Studio
and prepare two batch files named cropStretch.bat and montage.bat
the camera animation can be exported
so you could render your tiles in Daz Studio 1, 2, 3, 4 Blender, Poser or Carrara
Once the (usually 72) tiles are rendered
you can run the batch file cropStretch.bat
and imagemagick will massage the 72 tiles
then you can run the batch file montage.bat
and imagemagick will assemble the (usually 6144x3072) mosaic and save it as a jpeg or png image
the other popular format will probably be 128 tiles (16x8 ) and a mosaic size of 8192x4096
The script will help you adjust your render camera's focal length
aperture science brings you the auto focal length button
there was cake, it was a blackforest cake, with delicious cherries and chocolate scrapings on top
this is some amazing work guys, how hard is this to implement and try out in Daz3d at the moment?
Did you also say it could be used in Blender?
i'm currently working on something else, but i expect that tomorrow
i'll finish this here
usage will be
- get and install imagemagick (not by me )
- in daz studio, set up your scene
- create and select your render camera (a normal camera)
- run the script
- it creates a 72 or 128 frames camera animation, it's the camera looking in 72 directions
- render the 72 frames
- use the script and imagemagick to process the 72 renders
- use the script/image magick to assemble the 72 images into one big 6000x3000 pixels image
this image can be applied to a sphere in Daz Studio or to Blender's "World Environment"
it's just a painted sphere, but when you're at the center, and it gives the illusion that you're in the original daz scene
and in the case of Blender or Daz Studio IRAY or Daz Studio-Uber-Environment
that sphere can actually be used as lighting
adding fake shadows is harder, except in Daz Studio IRAY it's super easy ( but just the floor shadows )
expected release June 20th eastern time zone's evening
Great! I'll be watching for it.
i wrote and tested the camera animation exporter for DS 1,2,3,4
next i do the Poser and Blender camera animation exporters, test them once
then there's a few odds and ends to do
then i write the 1 page manual and release !
unrelated image, Amy and the propeller-skater-skirt
doing a 128-tiles render in Blender ... seems to work fine
and Blender has HDR and EXR and 16 bit formats, so, possibly ( not sure !) one could build true HDR skyballs in Blender
so it will work like this
create the camera animation using the mcjSphericalCam script in Daz Studio
still in Daz Studio mcjSphericalCam, export the camera animation as a blender python script blendcamanim.py
in Blender, select a camera, open and run blendcamanim.py
render the 72 or 128 frames (tiles) at a resolution like 512x512
assemble the rendered tiles into the 8192x4096 mozaic
using a batch file supplied by the mcjSphericalCam script
and the freeware image processing utility imagemagick
======
since the image tiles can come from "foreign" sources like Blender, Poser and Carrara
there will be 2 special buttons named
"Create foreign mcjMontage.bat"
and
"run foreign mcjMontage.bat"
you'll select the first of the rendered images, the mcjSphericalCam will
try to figure the tile sizes and column/rows to build the mosaic
---------
fig 2 - mcjSphericalCam generated mcjMontage .bat
which assembled (using imagemagick) the 8K x 4K pixel mozaic
That's not the final product !
but is shows that the camera rotated in the proper direction
====
the script will even be able to handle bizarre sequences like images from browsers
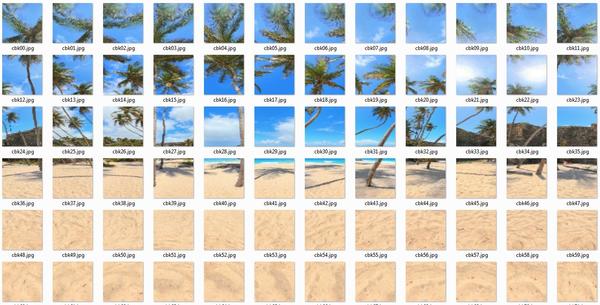
this is the batch file montage_cbk.bat which produces the mosaic montage_cbk.jpg
tada !
the camera animation was created in Daz Studio, using mcjSphericalCam
then exported as a Blender python script
then in blender the camera animation was applied to a camera
the 128 renders ( tiles) were saved as cbc0000.jpg ... cbc0127.jpg
an image processing batch file was created in Daz Studio, using mcjSphericalCam
this batch file was executed, and with the help of imageMagick 128 new cropped-and-stretched tiles were produced
another image processing batch file was created in Daz Studio, using mcjSphericalCam
this batch file was executed, and with the help of imageMagick the 8192x4096 spherical panorama was created
the bottom row tiles will be improved
----
fig2 the spherical panorama applied to a sphere in Daz Studio and a "real figure" no shadows but that can be done with iray, or using Carnite's method https://www.youtube.com/watch?v=qo2OVy9tf8E
----
fig 3 - not sure why yet but i had to stretch the sky-sphere vertically to get the white balls to be circular
---
fig 4 - well looks like the problem is my sky-sphere object in daz studio and its UV coordinates
or, it's inevitable that objects not at far distances break the illusion
But, mcjSphericalUVs seems to be doing good work
soooo
This newest project is coming along very nicely Casual. It will be so cool to make my own HDR files.... Now will I be able to export in the native .hdr format or just a image file?